
VIBURNUM: PLANT, CROP, SIZE AND MAINTENANCE

A Beautiful Plant In The Garden: Viburnum

The Viburnum is perfect and has it all, a generous flowering with some decorative berries, and foliage with beautiful hues during the fall, and sometimes even persistent! It is a very interesting plant throughout the year.

Pleasant in any garden, the plant, Viburnum tinus (Laurier tin) is grown both in hedge and pot. It is true that viburnum plicatum can be planted as an isolated subject, and you can choose the Viburnum opulus (snowball or viburnum obier) particularly in massive. Thanks to its winter or spring bloom, Viburnum brighten up and forget the gloom and the gray of the winter! Offering an abundant bloom with soft shades, pink or white, the viburnum is appreciated for its appearance “snowball”.

Origin Of The Viburnum

The Latin name is Viburnum, it belongs to the family of adoxaceae. Its common name is viburnum. Its flowering is winter or spring, and the plant can grow from 1 to 5 m, it particularly likes a sunny or half shaded exposure. As for the soil, it can be cool, well-drained, fresh and humus. Resistant, it can tolerate temperatures up to minus 15 or minus 20 degrees for the majority of species and -10 ° C for viburnum tinus.

Viburnums are very decorative because of their delicate blossoms, foliage and colorful berries with beautiful hues in autumn. It is true that Viburnum are very popular because of their many assets! During the winter or spring season, they can decorate massive with their generous pink and white flowers. After flowering, you will see red, blue or black berries bringing a new attraction to the garden and attracting many birds. In autumn, sumptuous orange or red colors cover the deciduous species. For example, Viburnum opulus (Viburnum plicatum or viburnum lantana) are trimmed. For persistent species such as Viburnum tinus (or Laurier tin), Viburnum rhytidophyllum or Viburnum davidii, they keep their foliage and remain decorative during all winter! These beautiful plants so installed in hedges will constitute a screen plant preserving you from prying eyes during the bad season.

The Cultivation Of Viburnum

Viburnum is very easy to grow and requires little maintenance. The majority of these varieties are relatively hardy and will be able to enjoy half shade and sun. Developing in rich, well-drained and cool soils, viburnum can be adapted to any type of soil. The plant, however, prefers acidic soils. Viburnuopulus, Viburnum davidii and Viburnum tinus are particularly resistant to pollution, which is why viburnum can be planted in urban and polluted areas.

Size And Maintenance Of Viburnum 

When planting, it is important to fold viburnum to facilitate new ramifications. Also, the shrub cannot be totally bald at the foot. Next year, you will have to renew the operation if needed. You will be able to carry out a maintenance size, you must know that viburnum is very small. This plant is very easy to maintain. At first, you will be able to remove all the oldest rods to facilitate the renewal of the latter. And, in a second time, it will remove all the faded flowers, especially after flowering. Regarding the species with winter bloom, you will have to intervene in March.

Glycine: Plant, Crop, Size And Maintenance

Glycine, The Royal Climber

A wonderful climbing plant, glycine is very popular thanks to its generous and fragrant flowering.

Beautiful climbing and woody plant, wisteria is a classic plant in the heart of spectacular flowering gardens. This plant offers clusters of flowers measuring approximately 50 centimeters in length. Very decorative with its touch of romance, it can adorn pergolas, walls, and fences. It will also be possible to drive it on a rod to create an isolated subject in the heart of a lawn.

Origin Of The Plant

The plant whose botanical name is Wisteria belongs to the Fabaceae family. This beautiful climbing plant can measure between 5 and 15 meters high. Taking advantage of a sunny exposure, glycine can easily grow in ordinary soil. Belonging to the Leguminous or Fabaceae family, the genus Wisteria has about 10 species of climbing plants. They are all from the United States and Asia. The plant was brought to France in 1816. It is true that the fragrance of glycine is developed in perfumery, for the composition of different perfumes of large brands.

A little anecdote to emphasize is that the wisteria of Japan wraps easily on the support and also in the direction of clockwise. On the contrary, Chinese wisteria tends to curl in the opposite direction. Regarding the language of flowers, it should be noted that glycine indicates tenderness, and if presented in a bouquet, a friendship.

The Cultivation Of Glycine

For planting, it is advisable to plant it in the spring or fall. You will have prepared beforehand a mixture of potting soil, garden soil, and seaweed and manure type amendment. It is also possible to plant during the summer after watering regularly. It is advisable to avoid periods of high heat for planting. It is true that wisteria requires sun to grow and bloom abundantly. In addition, it is not useful to bring fertilizer because glycine does not require even to facilitate the development of the foliage.

To multiply glycine, it is necessary to know that the cuttings are easily feasible on the glycine, just as the technique of the marcottage. It is also possible to plant the seed of glycine in the heart of pods giving rise to a seedling. In addition, this technique proves to be quite long before seeing the appearance of the first flower, the wait can last between 10 and 15 years …

Size And Maintenance Of Glycine

The size of the glycine is relatively easy and can be done every year otherwise you will be quickly invaded. In fact, glycine tends to gain, throughout its growth, and little by little ground. Also, the size will be done during the period of vegetative rest, since the fall of the leaves and this, until the end of the winter.

It is really advisable not to trim wisteria during frosts. Indeed, at that moment, the flowers appear directly on the stems of the past years. Also, you only need to prune the new shoots of the year in order to facilitate the flowering of the next season. During the winter season, you will have to cut the side shoots and leave only one or two eyes. Then, leave the main branch and then cut short all the stems starting from this branch. Do not forget to remove all the faded flowers, they have toxic seeds.

40 Great Indoor Plants You Can Grow With Zero Effort

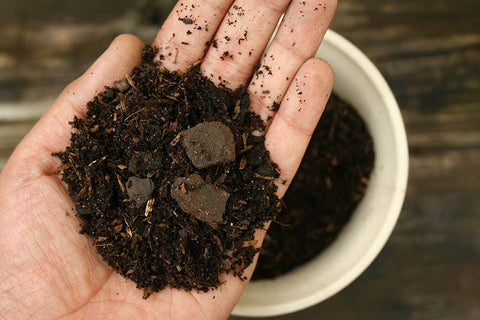
While we all are familiar with what wonders the plant-based diet does for our bodies, few are aware of the fact that plants can improve your overall health just by being inside your rooms in your house and not just for decoration. In 1989, research by NASA proved that certain indoor plants can improve the air quality in a home by absorbing chemicals such as benzene, formaldehyde, and trichloroethylene, therefore, acting as natural air purifiers.

Moreover, a study has shown that indoor plants have positive effects on mental health as well by reducing stress, improving your blood sugar levels, etc. Common houseplants are usually succulents, cacti, and tropical or semi-tropical epiphytes.

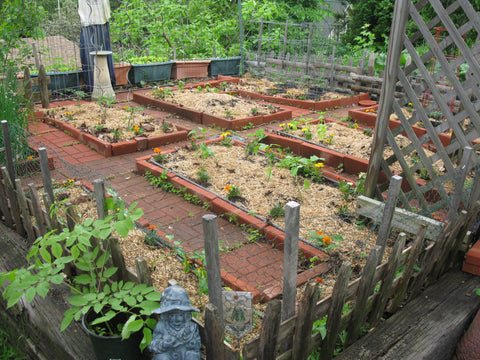
So here’s the wide list of 40 indoor plants that you could add in your space; home or office for a little dose of zen.

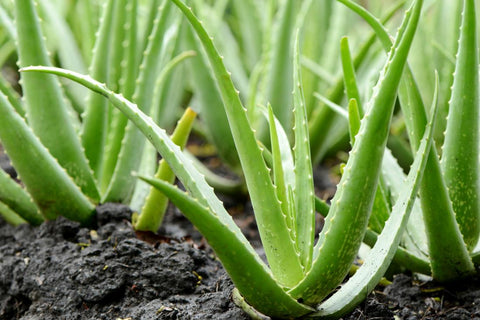
1) Aloe Vera: They have numerous healing properties. Not only known to alleviate cuts and burns but also to detect the air quality in the environment. If the air is polluted with toxins and harmful chemicals, the plants’ leaves will show up brown spots. Aloe Vera also absorbs airborne particles from paints or cleaning agents. Moreover, they come in handy for your food and drink recipes. 


2) English Ivy: This is good for purifying the air indoors, absorbing a large portion of the airborne mold. Ivies prefer dry soil and bright sunlight. So keep it somewhere bright and sunny.


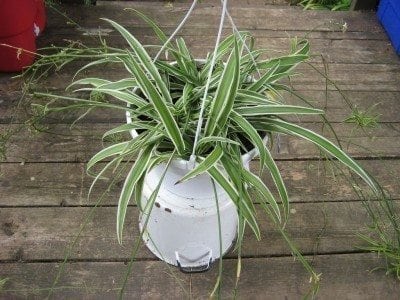
3) Spider Plant: In summers, the spider plants produce tiny white baby spider plants, on its long stems called “pups”. You can re-pot these pups and keep at well-lit spots for added greenery. They are commonly known for their air-purifying capabilities, although in large quantities spider plants should be planted to reap its true benefits.


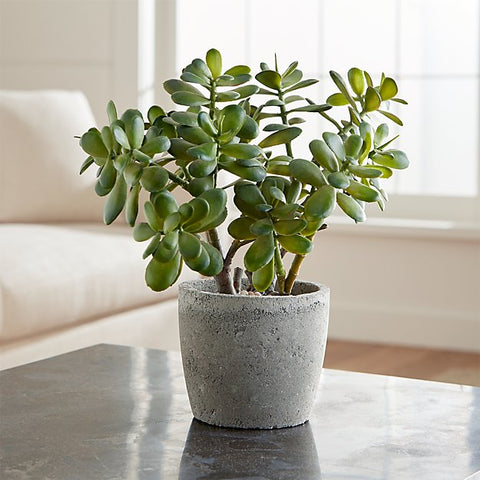
4) Jade Plant: They are an interesting succulent plant which has unique bush-like structure. These don’t require a lot of suns and in too much sunlight, they develop a red or yellowish tint. Also, jade plants need very less water throughout the season. 


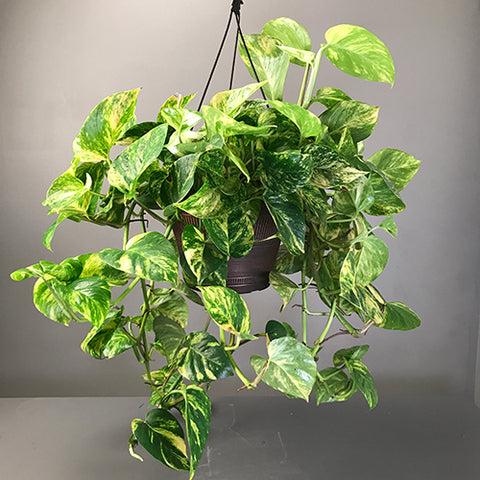
5) Pothos Plant: One of the most common and popular houseplants, also known as ‘devil’s ivy’ due to its exceptional hardiness and the belief that it is nearly impossible to kill. Pothos can be grown as a suspension plant, as the leaves will grow down in long cascading vines. They make in the list of NASA for its ability to absorb formaldehyde from the air and toxins from carpets/rugs.  Like a lot of other indoor plants, these can thrive in a wide variety of lighting. 


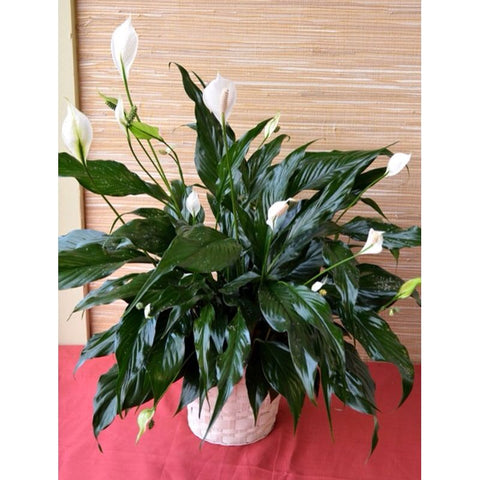
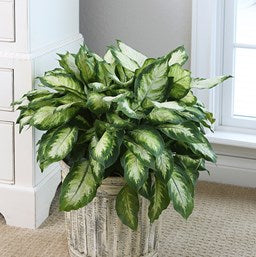
6) Peace Lily: This is a wonderful low maintenance flower to keep in a home which does not get a lot of natural light. As found by NASA, this is known to breakdown and absorb compounds like; carbon monoxide, formaldehyde, and benzene from the air. Peace lilies prefer shades and cooler temperatures. 

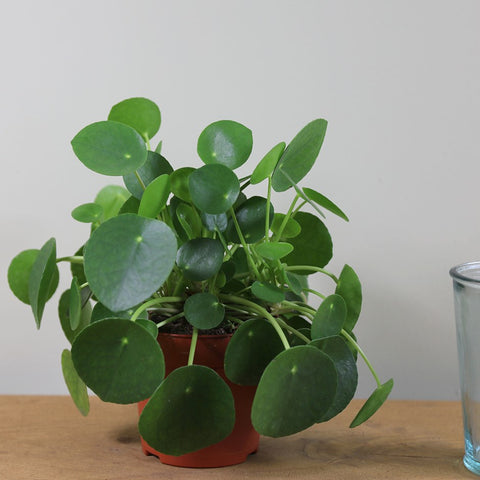
7) Chinese Money Plant: This bright green colored, pancake-shaped leaves with straight stems plant is easy to care household plant. Chinese Money plant does not require direct sun but prefers warm temperatures with adequate well-draining watering pots. You could propagate the little offshoots that rise from the base of the plant and spread them for more green corners in your apartment.


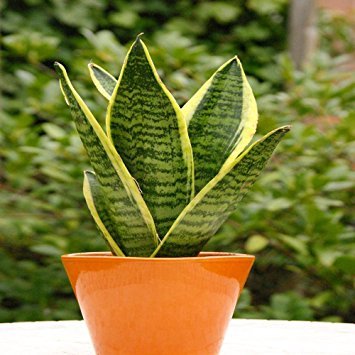
8) Snake Plant: They are very common, low maintenance house plant is known to purify and eliminate toxins like; xylene, toluene, and trichloroethylene from the air in your home. Snake plants can withstand any environmental conditions, considered exceptionally hardy as well as, indestructible by many; they require indirect sunlight and irregular watering. 


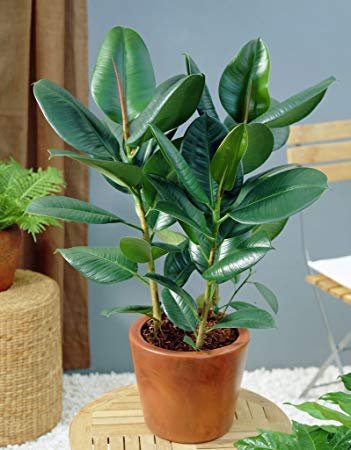
9) Rubber Tree: The tall, glossy Rubber trees can take a lot of neglect, absorb much more toxins from the air than any other plant; then converting them into nutrients for the plant or compounds for the soil. They love bright, well-lit, and high humid areas. These can grow up to 8-foot, add in your office or living room for a major pop of green in the room; for short length prune the longer stems and shape it as you like. 


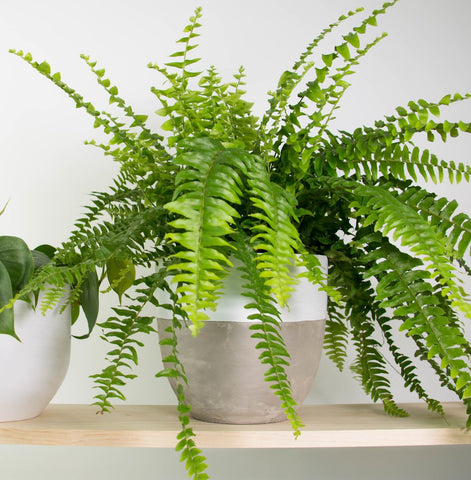
10) Boston Fern: The tropical Boston ferns are powerful toxin eliminators and are easy-to-care-for. These eliminate compounds like; formaldehyde, cigarette smokes from the air, plastic particles, etc. the gorgeous fern needs bright filtered light and damp high nutrient soil. 

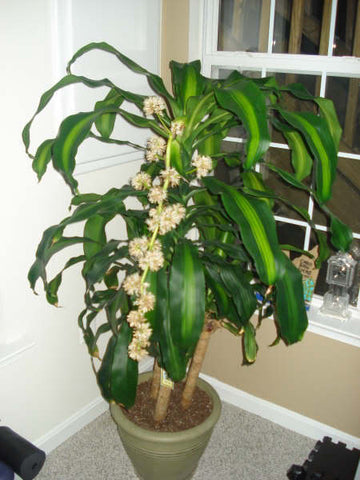
11) Mass Cane: Also known as, “corn plant” this ranks number one in NASA’s experiment in removing formaldehyde. It is low maintenance and slow-growing plant grows most healthy in well-lit areas. 


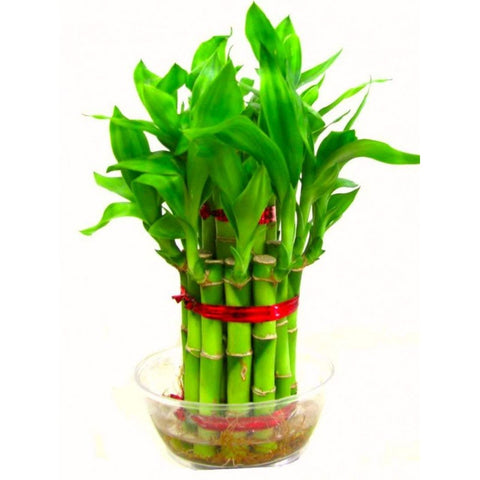
12) Chinese Water Bamboo: Or the “lucky bamboo plant” doesn’t really need soil to grow, only now and then changing the water is sufficient for this beauty. Direct sunlight or hot temperature may harm the plant, hence cooler and bright areas are favorable. They are found in a variety of types like the spiral, tree, trellis, bunch, etc adding these will give feng shui and Zen vibe to your place. This bamboo has been a significant part of Chinese culture for thousands of years but its popularity has touched heights all over the world for last 15 years. 

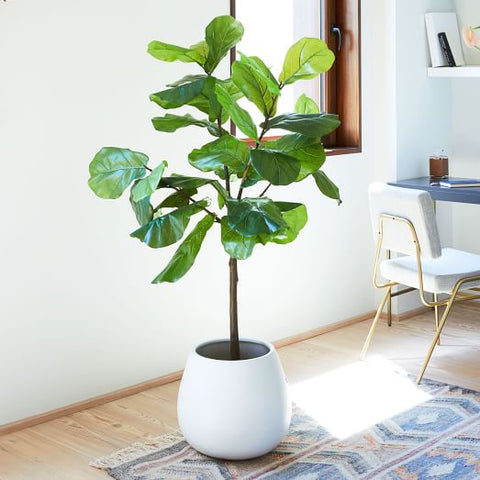
13) Fiddle Leaf Fig Tree: Fiddle leaf figs makes a beautiful, tall indoor tree which has broad, dark-green waxy leaves brightening up your room corners. These hardy tropical plant can grow up to 50 feet tall and is best for less floor space and high ceilings. They require bright light and only need to be watered when the soil is dry to touch.


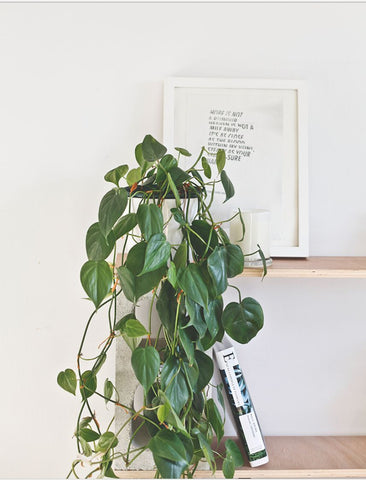
14) Heartleaf Philodendron: Tiny heart-shaped bushy philodendron is a popular indoor plant for many years as they are easy-to-care-for that needs indirect sun and damp soil. You can put them in hanging pots or trellis because they grow into beautiful decorative vines. As Ivies, these are great in absorbing xylene.


15) Bamboo Palm: They have made on to the list of NASA as one of the best air- purifying plants, having a purifying score of 8.4. The attractive Palm is known to absorb trichloroethylene and benzene then converting them into compounds that are utilized by the plant for nutrients. 

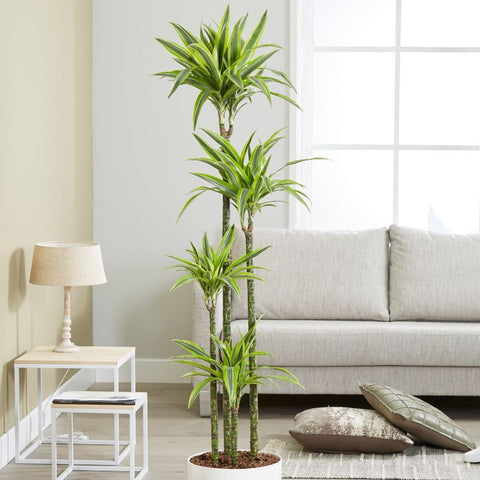
16) Red-Edged Dracaena: This gorgeous Dracaena can grow up to 15 foot tall, removing pollutants like; xylene, trichloroethylene, and formaldehyde. Prefers bright sunlight and moist soil. 


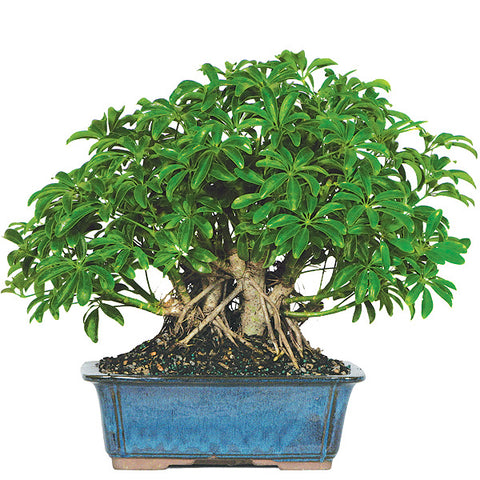
17) Oxalis: One of the most vibrant colored Brazilian household plant. They prefer quite a few hours of direct sunlight in a day and normally sprout within a week. Their color ranges from violet to crimson.


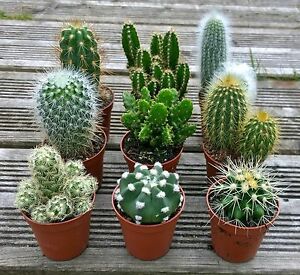
18) Cacti: Very popular, low maintenance and non-fussy plant that we all know requires less water and care. Too much sunlight might bleach your cactus so consider keeping them in bright indirect light. They blend into a variety of homestyle/offices and enhance its aesthetics. 


19) Dragon Tree: Dragon tree is low-maintenance, fast growing and great for corners office plants. They grow strongest in bright indirect light and moderate temperature like any other house plant. Water it only after the soil is dry.

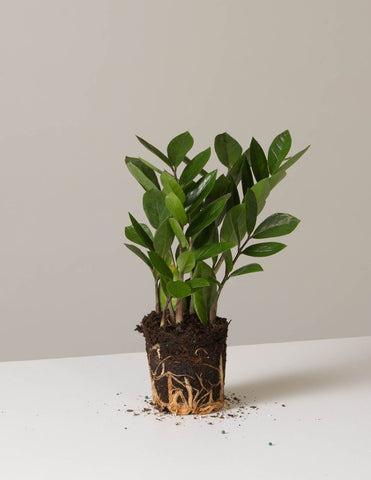
20) ZZ Plant: Zamioculcas Zamiifolia produces brilliant bright-green leaves with tall stems. These hardy plants are easy to maintain and need less fertilizer and brightlyt lit spaces.


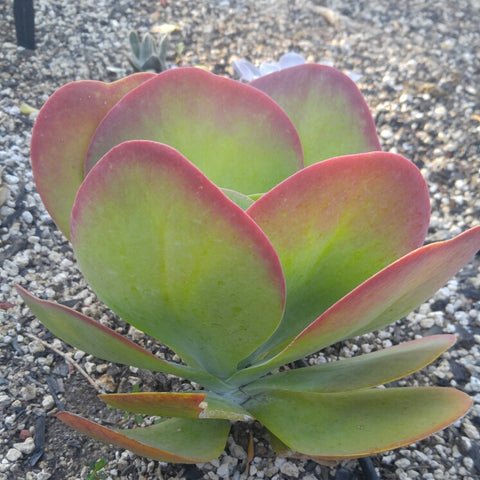
21) Paddle Plant: These non-fussy, low care succulent can bear some direct as well as indirect sunlight. Paddle plants do well in a dry environment and hence, prefer soil more on the drier side. In too much sun, they might develop reddish tinge on their leaves. 


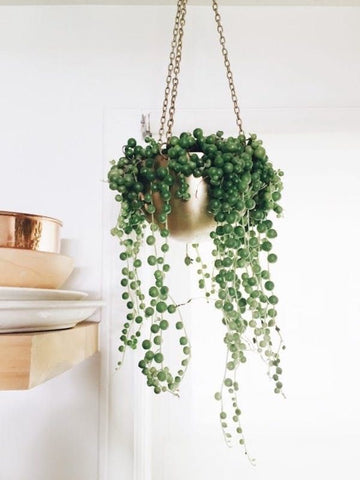
22) The string of Pearls: This amazingly unique indoor plant will definitely amp up any space. This beautiful Senecio rowleyanus is best for hanging planters, preferably in bright spaces but not sunlight, they produce a delicate chain of round beads that overflows the pot. They prefer soil more on the drier side.


23) Dieffenbachia: This pretty tropical-looking plant can grow up to 6 feet long, they love normal room temperature and don’t do well in cold. They prefer low indirect shade, try keeping the soil evenly moist.


24) Weeping Fig Ficus Tree: Weeping fig has shiny leaves and could be grown as a tiny topiary. It loves full sunlight or at least bright, filtered light, prefers several days of dry soil in between watering. 


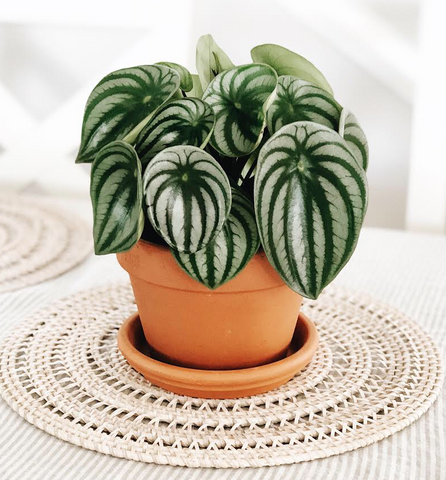
25) Peperomia: Peperomias are small, often with colorful leaves and easy-to-manage plants, some of these varieties include; watermelon, red-edge and ripple peperomias. They have shiny, textured leaves and prefer room temperatures with low-level lighting conditions.


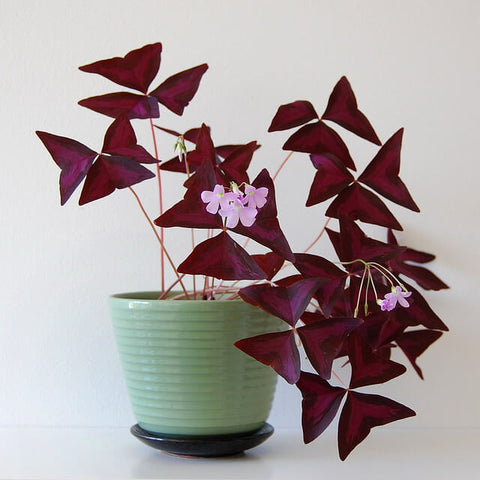
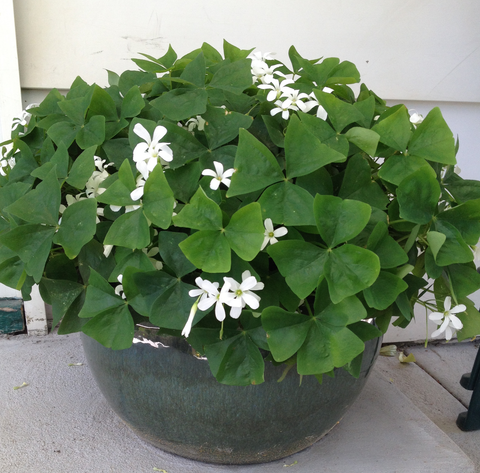
26) Shamrock Plant: They have bright green leaves and grow small, sweet-smelling white flowers on its tall stems. This indoor plant loves bright indirect sunlight.


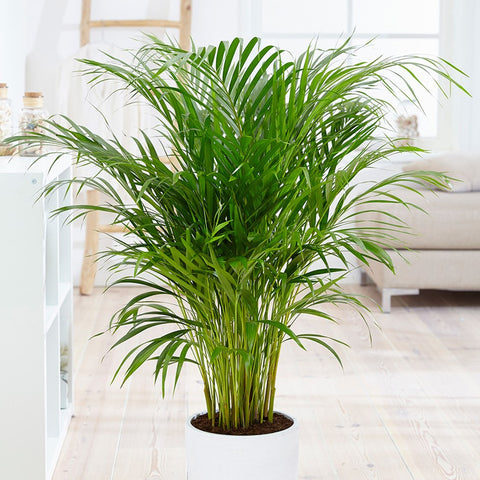
27) Areca Palm: This tropical plant can grow up to 7-feet tall and prefer indirect light. Need to keep the soil fairly dry.


28) Silver Dollar Plant: Xerosicyos danguyi drought-tolerant succulents need planters with good drainage. Xerosicyos are actually a climbing succulent so leave a little headroom wherever you display them! They love spaces with direct sunlight is best.


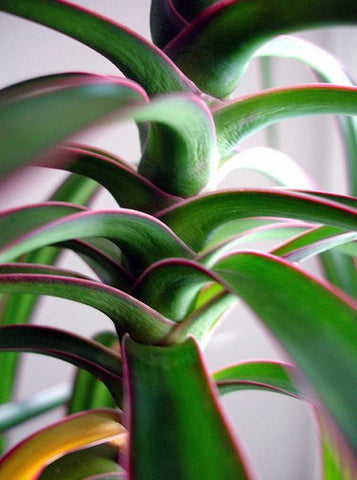
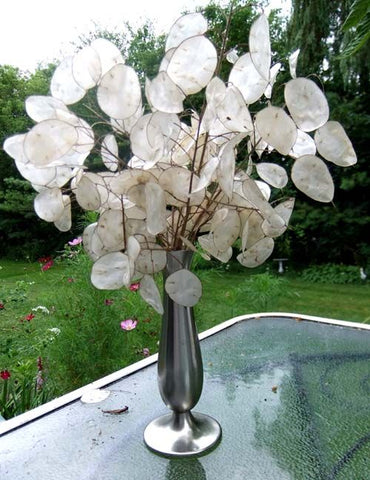
29) Tillandsia: Succulents of Tillandsia family are some of the easiest to care for, very low maintenance plants. Besides occasional misting, they’ll take all the water they need from the humidity in the air. Another benefit is its lack of root system, so you can be creative with this plant and make wonderful arrangements like sea urchin shell planters and hang them to amp up any room.

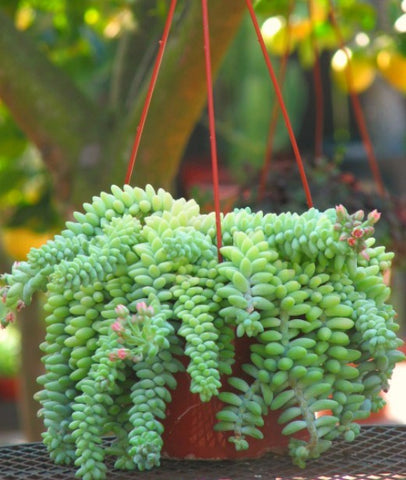
30) Donkey Tail Plant: Sedum morganianum or Donkey Tail Plant is a wonderfully unique flowering succulent that loves bright direct light but not extreme heat, and require regular watering in hot weather but too much watering can harm during its dormant winter stage. 


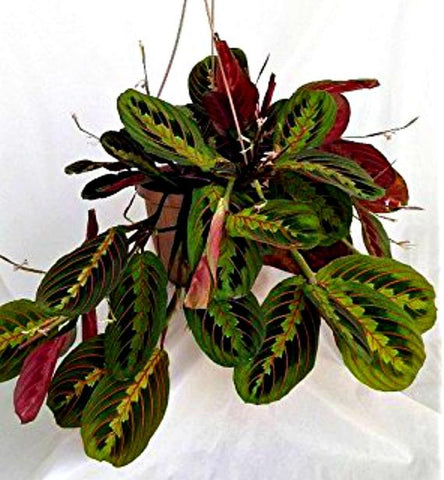
31) Prayer Plant: These plants look like a work of art. Maranta leuconeura has leaves with red veins that makes them a great accent for interiors that need a little color. The leaves actually rise and contract in the day-night cycle, quite interesting to watch as the day progresses. This folding effect is how it gained the common name of “prayer plant”. Like many low-maintenance plants, these simply need indirect light and even a lot of moisture.


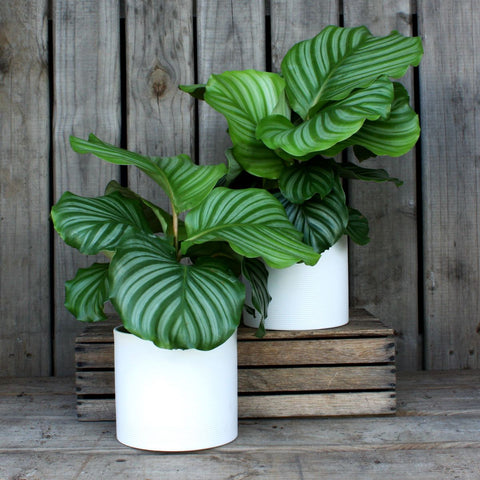
32) Calathea Orbifolia: Smooth streaks of white stand out against the vivid green leaves of the Calathea orbifolia, like an art. These plants are a little tricky to care for compared to other indoor plants. Moist soil, good drainage, and low but reliable lighting conditions are a great to start with.


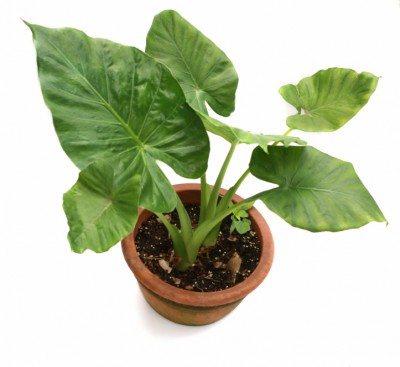
33) Elephant Ears Plant: Colocasia gigantea is another big and wide-leafed plant for interiors that need a good amount of bright light. In some Asian countries, including Japan and parts of Vietnam, the stalk is a popular ingredient in meals in the regional cuisines. They are a little tricky to grow indoors but quite worthwhile, needs indirect sunlight and considerably high humid regions.


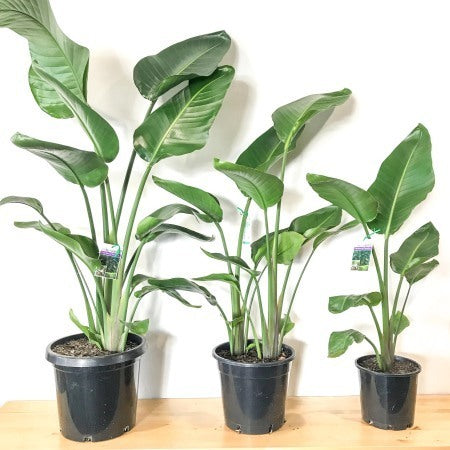
34) Giant White Bird of Paradise: This statement plant can grow up to 20 feet tall in ideal conditions. Strelitzia Nicolai loves bright sunlight, damp soil and needs the change of fertilizer monthly to grow its best.

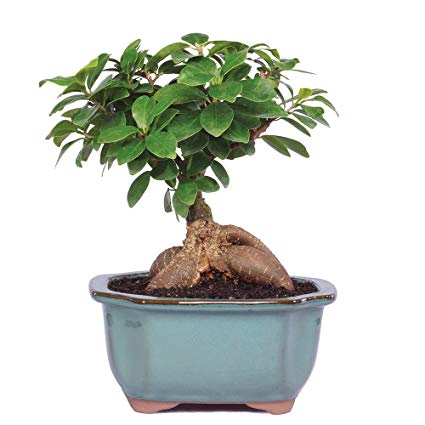
35) Hawaiian Umbrella Tree Bonsai: Plant enthusiasts will love this versatile and attractive tree, officially known as Schefflera arboricola. Even better, they stand up wonderfully to a variety of lighting conditions and watering routines. You can let your umbrella tree grow naturally or trim it into a desired shape. Let it grow tall, or restrict to a small planter as your needs.


36) Grafted Ficus Bonsai: Ficus micro-carpa “Ginseng” is very forgiving, easily tolerating conditions ranging from low to bright light (but not direct sunlight) and can live through irregular watering for the most part. They are a wonderful addition to any office environment.


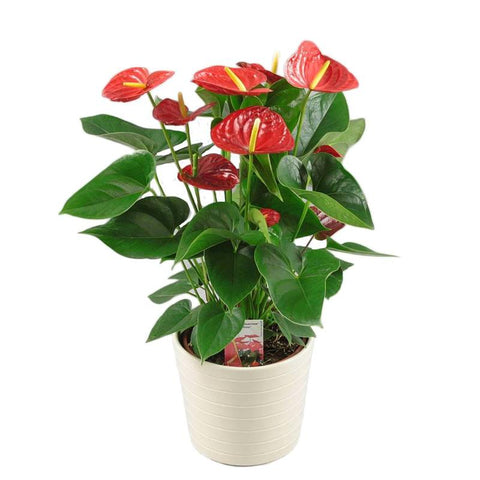
37) Anthurium: This plant is very popular for its long-lasting, eye-catching red blooms. These waxy red flower plant needs indirect sunlight and prefers dry to slightly moist soil.


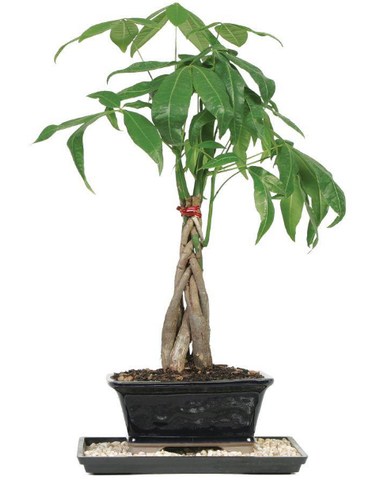
38) Guinea Chestnut: This beauty is native of swamp forest and features a beautiful braided trunk. It is more commonly known as a money tree, Pachira aquatica prefers a spot with bright, indirect light and frequent watering.


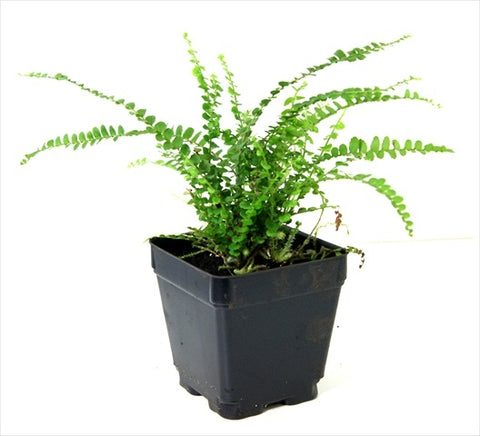
39) Lemon Button Fern: Nephrolepis cordifolia fern is a native to Asia, Australia and Hawaii. Like many ferns, it poses no danger to pets. These are easy to grow and low on maintenance. 

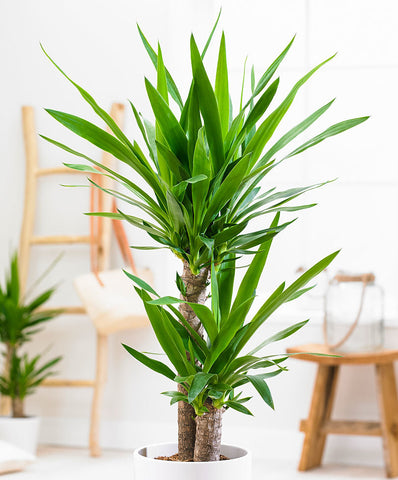
40) Yucca: Yucca Gigantea, is a species that is native to Costa Rica, El Salvador, Guatemala, Honduras, Nicaragua and the eastern part of Mexico. The secret to keeping your yucca is easy: Sun, sun, and more sun. Water sparingly and plant in a deep container to prevent the top-heavy woody stems from toppling over.


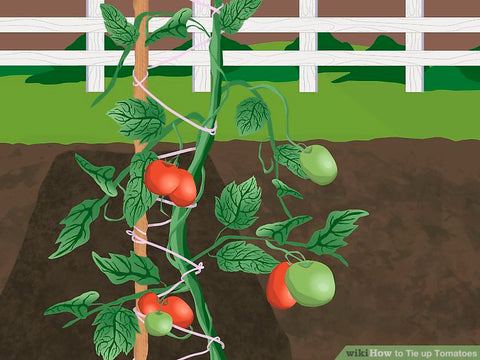
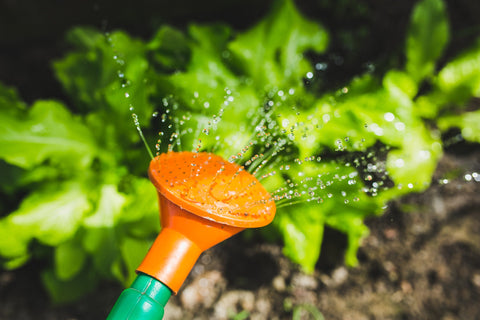
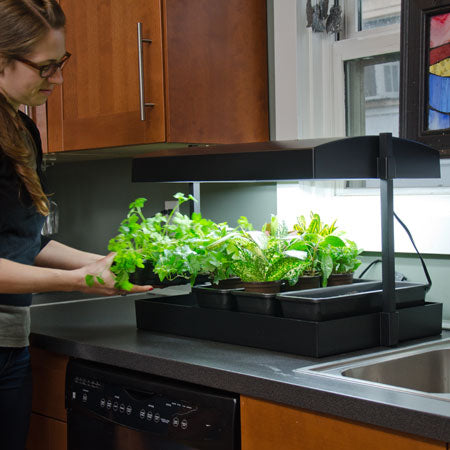
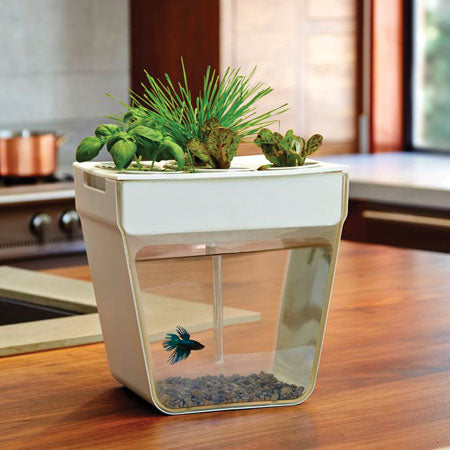
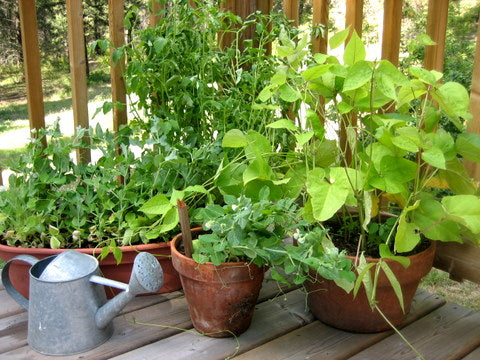
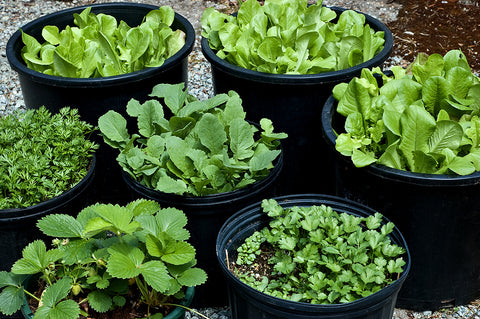
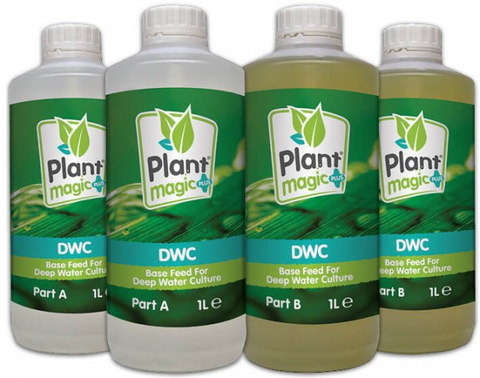
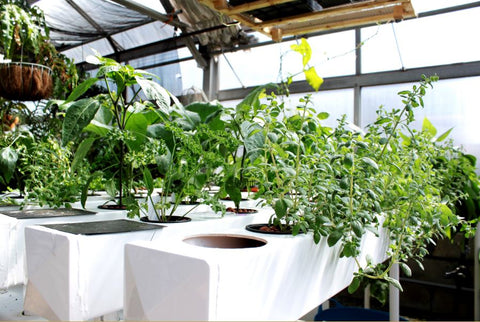
Growing indoor plants hydroponically can be very simple. If you do not have the time to grow plants but you want greens indoors, this is one of the best method for beginners. Watering and nutrient measurement can be fine-tuned to suit your plant. All the above plants can be grown with zero effort with a herboponics smart garden. You can grow a wide variety of plants hydroponically indoors ranging from decor plants to edible herbs! Giving you a choice to grow lettuce to basil in your kitchen itself. The commercially available nutrient solution gives almost foolproof feeding to your plant. Technology has reduced a lot of assumptions and has automated uses to save your valuable time and effort.

How To Graft A Fruit Tree?

Overview

Many cultivators enjoy grafting a fruit tree. Grafting is the art of connecting or fusing twig branches from two separate but compatible fruit trees. When it’s done successfully, a crossbreed between plants occurs, and this results in beautiful, healthy flowers. A variety of fruit trees can be grafted. Citrus-type fruit trees are commonly grafted because they’re often compatible with other types of citrus trees.

Step 1

Cut two twigs from compatible fruit trees. Cut both twigs at 45-degree angles. Cutting twigs during November and December works best because the twigs are dormant and buds have not begun to sprout.

Step 2

Secure the two twigs together. Adjoin the two twigs at the cut to allow the plant cells to fuse together. Use commercial grafting tape to fuse the twigs together. Rubber electrical tape or duct tape may also be used if grafting tape is not available. Firmly attach a rubber band around the grafting area.

Step 3

Allow the twigs to fuse together over 2 to 3 weeks. If you’re not planting immediately, place the twigs in the refrigerator. Dipping the twigs in wax seals closes the ends and prevents drying. Place the unused twigs in a plastic bag. Apply a few drops of water into the bag.

Step 4

Eliminate fast-growing bud tips. If some buds appear to grow at a faster rate, remove these from the twig. Do not cut the twig branch. Wear gloves or protective tape over your fingers to prevent accidental cuts.

Step 5

Remove the grafting tape before the site area starts to expand. When the twigs begin to fuse and flourish, remove the grafting tape. Examine the tape and look for signs of tightening and girdling. Girdling can choke and damage the twig.

When To Plant Tomatoes?

Overview

Tomatoes are fruits that are commonly mistaken for vegetables and in ancient times were even considered to be poisonous. Reintroduced to the palettes of Europeans by the early explorers, the tomato began to gain in popularity once it was realized that the tales of toxic tomatoes were, just that, tales. The interest in tomatoes began to boom during the 1900s in America, and they have been respected members of the produce community ever since. But as delicious as tomatoes are from the local supermarket, nothing beats the taste of a home-grown tomato. Most gardeners have great success growing their own tomato crops, but how and when to plant them is the most important consideration.

Step 1

Begin planting the tomato seeds in trays over the winter season. Seed tray kits are inexpensive, and convenient, and will allow you to start growing your seedlings indoors, in spite of the weather outside.

Step 2

Transfer the seedlings that are beginning to outgrow the seed trays into 3-inch pots. When the tomato seedlings begin to grow in height and width, it is time to give them more room. In order to accommodate their expanding root system, a 3-inch pot should be used. Place the pots in an area that receives plenty of sunlight during the day, or use ultraviolet light, and water regularly to keep the soil moist.

Step 3

Head out to your garden after the final thaw of winter, and start to prepare your garden. Ideally, mid-May is the best time to consider planting outdoors. Soil quality is very important, so add some compost and fertilizer. Break up the soil with a garden rake, and mix in the fertilizer and compost well.

Step 4

Arrange your tomato pots in the garden approximately 2 feet away from each other. Tomato plants need a lot of room to expand, so you will want to avoid overcrowding. Laying the pots out on top of the prepared soil first will help you decide where to dig the holes.

Step 5

Remove the pots one at a time, by lifting them up, and digging a hole that is large enough to accommodate the plant and its original soil that is surrounding the root. Continue the process until all of the tomato plants are in the ground and removed from their 3-inch pots.

Step 6

Support the tomato plants by using wood stakes, or plastic rods. Carefully tie the plant against the stake using twist ties or strips of cloth. If you do not use some type of support system for the tomato plants, they will bend and break with the weight of the growing tomatoes. As a consequence, the tomatoes will usually rot if they lay on the earth for too long.

Step 7

Water the tomato plants at least once a day during the growing season. Allowing the water to become soaked with a sprinkler or soaker hose creates an ideal growing environment for most tomato plants. In cases of heavy rain, skip watering for that day.

Step 8

Harvest your tomatoes as they begin to turn deep red. Although, you can also pick them when they are light orange, and keep them on your window sill until they turn red. This way, you can get them before the squirrels do.

Indoor Gardening Supplies

Growing plants is not really as simple as it first appears. For example, an indoor garden needs lots of special attention and care in order to flourish and bloom fully. Some of the things you’ll need are supplies formulated specifically for indoor gardens. The exact type of supplies required depends upon the exact type of gardening system you wish to use. Some of the most popular and successful indoor garden systems today are hydroponic gardening and aero gardening systems.

Hydroponic gardening means that you grow flowers, vegetables, and fruits using no soil or natural sunlight at all. The nutrient solutions include all the potassium, magnesium, calcium and other nutrients required by the plants. There are many benefits to hydroponic gardening, one of these is that you’ll have healthier plants that are free of insect damage. For a successful hydroponic gardening system, you will need tools such as an effective lighting system such as the 250 MH EconoWing manufactured by Better Grow Hydro to keep the plants thriving and provide light in the same spectrum as natural sunlight. The complete package, including the bulb, reflector, cord, wire hooks, and ballast costs about $180 and measure approximately 21 1/4 inches long, 15 inches wide and 4 1/2 inches tall.


In addition, to form a quality light system, you must have other supplies such as a poly-cart for transporting plants and tools around. you’ll also want a garden rack so you can organize your gardening supplies neatly. The EZ-Haul Poly Garden Cart, available at Amazon for $132.95, is extremely handy and every indoor gardener should have one.  This poly garden cart provides a six-foot poly tub which will never rust — and it’s guaranteed. It can carry tool and supplies up to a total of 250 pounds on the 20-inch easily maneuvered wheel. The cart weighs in at 44 lbs and measures 55 inches by 28 inches by 28.

The garden rack you select can really help in the organization of tools and supplies. You may only need a simple rack that is small and can be purchased for about $20. Depending on the number of tools and supplies you need to store and organize, however, you may opt for a three or four tiered garden rack. You can find the larger racks at Amazon and they fall into the $50 price range, give or take.


Perhaps the most important indoor garden supply you will need for hydroponic gardening is the blend of nutrients to feed the plants. Botanicare markets a line of nutrients and supplements which is perfect for hydro-gardening. Some of the products include soilless growing media and substrates, organic or bio-organic plant foods and supplements. For growing fruit and vegetables hydroponically, opt for the Botanicare Hydroplex Qt Item #732245 which can be found at Interior Gardens Inc. for $27.50 each. This nutrient blend provides all the supplements necessary for your plants during reproduction, fruiting, and flowering. It contains sulfur, potassium, and phosphorus to enhance the plants’ development. It is also fortified with amino acids, humic acid, seaweed, and vitamins, providing your plants everything they need, including those nutrients which would normally be mixed with water and fed through the roots.

Some other indoor garden supplies you might require are hoses, fans, containers, air pumps, and a few others. Successful hydroponic gardening will offer tons of benefits that simply aren’t available from older, more typical methods of gardening using soil as the growing media. Plus, you can find some great online guide and tips to help you learn exactly how to grow the very best hydroponic garden in your own home.

Helpful Tips For Your Flower Garden

Now day’s many people are getting involved in flower gardening. This is a simple and rewarding hobby for many people. Flower gardening is a simple hobby but it requires a lot of commitment, hard work, and dedication from you.

In this article, I will be discussing 3 essential tips for flower gardening which will ensure you a beautiful, healthy and well-structured flower garden.

Planting

First and the major step for flower gardening is to decide where you want to plant your flower garden. There are lots of options available out of which you can select any one which is best suitable for you.

You can plant your flower garden in a container. It is easier and simpler to manage because you can replicate the soil conditions as you want.

Next option is available in your backyard. If you have a sufficient amount of space available in your back then you can easily plant your flower garden in your backyard. Before planting your flower garden in your back yard you have to follow some basics such as you must test your soil for determining the type of soil in your backyard. Next, your soil must be equally composed of clay and sand.

Gardening Journal

A second essential tip for flower gardening is a gardening journal. This can help you in tracking your flower garden progress and it is highly recommended too.  A gardening journal will help you in determining your success and failures. You can easily distinguish the flowers which have grown properly and which have not grown properly. This will definitely help you when you grow your next flower garden. There is professional software available in the market which can help you in the tracking of your flower garden or you can simply use any notepad to keep track.

Organic Materials

Final tip for flower gardening is the use of organic materials. Presence of a suitable amount of organic matter or fertilizers in the soil will make the soil fertile and nutrient rich. Such type of soil will ensure a healthy and beautiful growth of your flowers in your flower garden.

If you think that your soil does not have enough amount of organic matter, you can change the soil by adding compost in it. You can prepare the compost at your home or you can easily buy it from your gardening supply store. Compost provides necessary nutrients which are very beneficial for flower gardening.

Above mentioned were 3 essential tips for flower gardening. You can easily grow and maintain beautiful flowers in your container or in your backyard by just considering the above mentioned tips.

How to Plan for Your Vegetable Garden?

The arrival of seed catalogs by mail and the appearance of seed racks in stores signal the time to start planning your garden. Both the catalogs and the seed displays appear in time for early spring sowing of slow-starting seeds indoors.

1. What’s your climate like?

When you select the vegetables you will grow„ consider two climate factors.

  1. The first is frost tenderness. The length of the growing season for frost-tender vegetables is determined by two dates, the last spring frost, and the first fall frost. Plan to grow frost-tender vegetables only in the period between the two average dates for your area.
  2. The second important climate consideration is the temperature preferred by the vegetable—warm or cool. Even when the danger of frost is past, warm-season vegetables need adequate heat to germinate the seed, set fruit and ripen their crops. Cool-season vegetables will usually recover from a moderately heavy frost and can he grew throughout the winter in mild climates. These grow poorly when it’s hot.

With most warm-season vegetables, the fruit is what you harvest (tomatoes, squash, melons, peppers, eggplant); with most cool-season crops you harvest the leaves, roots, or stems (lettuce, spinach, carrots, broccoli). Seeds of warm-season crops will not sprout and plants will not grow if the weather is not warm enough for them; cool-season crops will bolt in warm weather, producing premature flowers and seeds instead of the leaves, roots, stems, or immature flowers that you want to harvest.

If you think your climate is too cool for the crops you want to grow, try early varieties—they require less heat to mature than late varieties. Some warm-season vegetables, however, require so many warm clays and nights that they rarely succeed in northern states.

Carefully consider your climate and the beginning of the frost-free period before deciding when to plant. Don’t assume that because seeds or plants of a particular vegetable are on display it’s the best time for setting them in your garden. Dealers sometimes offer frost- tender plants too early for safe planting.

Once you know the climate requirements and length of the growing season of a particular plant, you might find that spring may not be the best time to plant some vegetables. In warm regions, for example, autumn is the best season for planting cool-season vegetables. And to avoid harvesting an overabundance of vegetables over a short period of time, plan for successive small plantings of many crops. Good timing is one of the key secrets to successful vegetable gardening.

2.Include some perennials

Only a few vegetables will come back reliably for several seasons, sending up new growth from heavy, frost- hardy roots: asparagus, horseradish, Jerusalem artichoke, multiplying onion, and rhubarb. (Jerusalem artichoke, a native American relative of the sunflower, is grown for its starchy tubers. The true artichoke is a perennial only where winters are mild.)

Don’t confuse these true perennials with annual plants that give you volunteer seedlings each spring from seeds dropped the previous year. Tomatoes, for example, are prolific reseeders. Volunteer plants can be grown to harvest, but they may not look or perform like their parents.

3. Climbers save space

Plant-for-plant, pole (climbing or runner) types often yield twice as much as bush varieties. Some people claim that pole varieties have more flavor than bush kinds.

Plan on training the vines up supports such as stakes, tepees, or frames. You’ll need 8-foot-long, 2 by 2-inch stakes for individual plants. For several plants, use 8-foot long 4 by 4-inch stakes as posts, running wire and heavy string between them. Tepees can be made of lightweight stakes or bamboo poles.

In very hot climates, don’t use metal frames, chicken wire, or galvanized clothesline wire for stringers. Plant leaves and tendrils can burn from touching the hot metal.

Only pole beans and tall peas actually cling. Beans cling strongly with spiraling, twining vine tips; peas that are bothersome to maintain can become excellent sites for vegetable beds. Drive short pegs or posts in the corners of these plots to keep hoses from knocking down the plants.

If you have scouted your property and can’t find a good site for a vegetable garden, don’t be discouraged. Look around your immediate neighborhood for idle land on which to plant a garden, such as easements under power transmission lines. (Check to see if you need a permit.) Small businesses sometimes have back lots that are eyesores but can be gardened in return for cleaning them up. And some forward-looking cities rent small vegetable plots for modest fees. Don’t depend on the inherent honesty of people to protect an off-premises garden, though. Passers-by may succumb to the temptation to take vegetables unless you can fence the area and lock the gate.

Container Crops

If you are short on the tillable ground, you might try growing vegetables in containers. Large wooden boxes, barrels cut in half, pressed pulp tubs, and large clay pots all make practical containers deep enough for all but the very largest vegetables. If a container doesn’t have drainage holes, drill them into the bottom and cover them with pieces of the clay pot or rock so the soil doesn’t run out with the water. Besides not allowing enough root room, containers that are too small dry out too fast and are easily tipped over. With proper crop container and aluminum sliding, vegetables will be safe from the threats and secure from “physical injury”.

Fill the containers with a porous, fast-draining soil mix. A heavy soil does not absorb water readily enough or drain fast enough to promote good root formation. A heavy soil mass will also tend to shrink away from the sides of the containers so that water will pour down the sides of the dry root ball rather than penetrating it. Use a commercial mix or make your own with one part garden loam, one part river sand, and one part leaf mold or peat moss.

If you use an artificial soil, such as U.C. mix, add lime and superphosphate to correct acidity and guarantee that sufficient phosphorus will he immediately available to the roots. (Add 5 to 8 pounds dolomitic limestone and 2 to 3 pounds superphosphate per cubic yard of soil.) Incorporating up to one-quarter soil into the mix will supply micronutrients not contained in the other ingredients and will add beneficial soil organisms.

To maintain steady growth, feed vegetables weekly with a fertilizer such as fish emulsion, diluted as directed on the label, or use a controlled-release fertilizer that provides the nutrients for the entire growing season from a single application. Check the soil for moisture daily—containers will probably need watering at least that often in hot weather.

Consider, too, the following points when deciding which crops to grow: 1. If the containers will be on display, the plants should he attractive, even during harvest. Fruiting plants, such as tomatoes, peppers, and eggplant, fall into this category, as well as such plants as Swiss chard that continue to grow even though outer leaves are harvested. 2. Select crops, such as radishes, lettuce, and chives, that grow quickly so you can harvest them and replant another crop in the same container. 3. Choose vegetables that yield a satisfying harvest from one or two plants. It would be impractical to use a number of containers for just one meal.

Hydroponics Nutrient Solution Brands

Know your options before you decide how (and what) to feed your plants

Hydroponics plants require access to varying levels of over 15 mineral nutrients in order to be healthy and grow. Gardeners can purchase each of these minerals and mix them together to make a custom hydroponics fertilizer, but it is very difficult to do.

The main reason for this is that most minerals aren’t sold in a pure state. Instead of purchasing pure potassium, one must purchase a chemical compound like potassium nitrate or potassium sulfate. As you can probably see, the chemistry involved in making your own hydroponics nutrient solution can be quite complex.

A much easier way to feed your plants is to purchase a pre-mixed nutrient formula. There are a number of different companies on the market who manufacture fertilizers specifically for use in hydroponics gardens. Nutrient formulas are sold in a concentrated form, and usually only need to be mixed in measurements of two to four teaspoons for every gallon of water.

Some nutrient formulas are sold as liquid concentrates, others in powder form. The liquids tend to be a bit more expensive, but they dissolve better in water. And, unlike most powders, some liquids also come with an added pH buffer, which can be beneficial.

It is common for hydroponics nutrient products to be sold in two or more special formulas – one for the early stages of plant life (usually labeled ‘grow’) and one for the flowering stage (usually labeled ‘bloom’).

Nutrient formulas can be purchased at hydroponics supply stores or ordered online. Here is a list of the leading brands:

  • Advanced Nutrients
  • Dutch Nutrient Formula
  • Dyna-Gro
  • General Hydroponics
  • Ionic

Whether you are mixing your own custom nutrient solution or adding a pre-mixed nutrient product to water, remember to follow these steps:

  1. Check the packaging for recommended measurements and carefully abide by them. You should not deviate by more than five percent.
  2. Measure each ingredient individually and then set it aside.
  3. Verify that each measurement was correct. Only when you are positive that you have measured correctly should you mix the ingredients.
  4. Use warm water if you can (not too hot though, or you will hurt your plants). Warm water is best for dissolving nutrients.