
UV Clarifiers For Indoor Growers

Normally, we use a sterilizer in our hydroponic systems. We have used clarifiers in the past in our aquaponic systems usually just to kind of clean water at the start. Once we get our nitrifiers introduced to our systems then, the nitrification gets on track and AP systems will often turn on a clarifier really quick to try. And take care of some of that algae until the system kind of evens out.

Use Sterilizers For Controlling Microbes & Algae

It’s sort of similar thing in hydroponic systems and we tend to use sterilizers pretty often for controlling microbes and for controlling algae in the system.

It can be really useful for making sure that nothing gets too far out of hand sterilizers or clarifiers are essentially just a tube usually plastic or steel stainless steel and there’s a lamp down the middle and inside of that lamp. There’s a filament that produces UV rays once you give it a little energy once you give it juice which produces UV light and it sterilizes all of the water flowing around it. So basically anything in that water anything that’s flowing with that water gets killed by that UV light and it prevents it from getting too out of hand also, prevents a lot of algae buildup in your system. It’s a simple and easy way to incorporate something in your plumbing to take care of algae and bacteria on the front end.

Could be a Little Expensive

There are other ways to deal with algae and bacteria. But if you’re just getting started this can be a fairly inexpensive and really efficient way to take care of those pests. So these are really easy to plumb in they come with instructions typically, they’re not that complicated. We’ve worked with several different types over the years and we’ve never had any issues they’re really easy.

Now the thing to keep in mind is that you will have to replace that bulb pretty often and sometimes the shroud and the shroud is actually made of quartz, not glass. Because glass filters UV rays so, that can get a little pricey.

They can be a little bit energy intensive at times. But that really comes down to sizing the lamp to your system, you would want to make sure that you’re putting in the right clarifier for the volumes. And because the fast you’re moving them, the more water you move around it, the less effective that UV light becomes at destroying that bacteria and algae in your system. 

Wrapping up, we use these things to control algae and bacteria and they’re great for that we don’t use them all the time. We typically just use them during the initial stages and on and off as needed. But they’re a great tool to have in your toolbox for controlling the biology of your solution.

Different Types Of Plugs For Starting Seeds In Commercial Vertical Hydroponics

The way that we plant our seeds and the best kind of mediums for transplanting seedlings into our towers, specifically for indoor growers. If you don’t have heavy aeration. There is a couple of alternative to just using regular potting mixes or germination mixes.

1. Flexible Plugs

This is the most popular all of those. There are a few different manufacturers that are making these now, but they’re very interesting. These area peat products or a coir product that is bound with a polymer. They put the kind of a plasticky rubbery material in there and it actually binds all of the fibers together. They can actually incorporate a lot of slow release fertilizers into these types of things.

So that these plugs there are actually, they can basically put all of the fertilizer for starting your seeds in these things. You can ditch the whole hydroponic aspect of your seed starting, which is kind of nice. These are great little plugs and you’ll see how they compress which makes them a great fit for towers. Because they’ll compress very nicely going in and they’re really nice and easy to deal with.

The one drawback to these is they aren’t as compostable as just say growing mix or something like that or regular potting or germination mix. They’re a great material and they’re very popular with a lot of people who grow with ZipGrow towers indoor and out.

The one drawback to these is they can get a little pricey if you’re buying them in small quantities. In large quantities, they’re still fairly pricey if you can just compare them to traditional germination mixes or something like that. They’re well worth the money if you’re doing things in kind of a small and medium scale. They’re very easy to work with. When I think small scale, typically we’re talking several hundred to several thousand of these plugs. A larger scales would be 10 thousand to 100s of thousands of these, at that scale.

There are a lot of things you can do with these. They can be really useful to you and I would definitely think about getting together with some other growers if you’re thinking about ordering these to try and get a better price.

2. Rockwool

It’s basically a type of rock that they cook at a really high temperature and run through a machine that spins it out into a fiber and you end up with this product. It’s also used as insulation, right. It’s a great product by and large for seed starting and especially for cloning if you’re doing a lot of cloning.

It’s one of those things that I would tend towards more of a more natural product like peat or coir over Rockwool most of the time simply. Because this stuff does not biodegrade, it doesn’t breakdown. It will go a landfill and it will be here till the end of time. That’s always a little concerning when we create things that last forever and ever, that always concerns me a little bit.

It comes in a lot of different ways. One of these ways is these little cubes. Basically, each little piece will tear off. If you drop your seed in the hole in the top, it just kind of tears away and you can transplant the seedling with the plugin it. It’s handy stuff. It’s nice because it holds itself together and you don’t really need a plug tray or anything like that. We just use trays for our seedling station. The seedlings will grow in this, tear them off to transplant them. It’s handy. It’s a useful material.

The only drawbacks are that it can get kind of pricey at scale and it’s doesn’t breakdown, it will be here forever and ever. That is definitely something to consider when you’re thinking about the different types of growing medium that you can use.

3. Jiffy Pellets

Jiffy pellets can be used and they’re great. I’ve just found them to be a little pricey and a little hard to handle. If we could get them in bulk and if we had the automation equipment to automate planting Jiffy pellets they would be great. I really like Jiffy pellets.

4. Oasis

Oasis is another thing that people ask about. In our opinion, Oasis products they tend to smash up when they’re compressed within the towers. And you end up with plastic bits in your system which isn’t always the best thing in the world. We tend to advise people to avoid Oasis products and focus more on Jiffy or peat pellets that type of thing. That is when the Rockwool or the polymer bound FlexiPlugs aren’t your things.

5. Bare root plants

Bare root plants, you can do bare root especially if you’re using wicking strips, you can definitely use bare root plants. The problem is transplanting. A lot of people will grow them out in a hydrogen system and when they pull the seedlings out they’ll just sprinkle seeds when they pull the seedlings they actually damage a lot of roots.

The shock going into your system when you plant that bare root plant can be pretty significant and slow down your product cycle, we’re talking several days. Aeroponic, folks that are doing mist systems or high-pressure aero, something like that. They take their plant and they plant in these systems, that’s not the best way to transplant those plugs. Because it will again damage your root system and you end up with some seedling shock which slows down your production cycle.

Of all of the things, we do recommend starting your seedling in some type of growing medium. Whether it is something like Rockwool, whether it is FlexiPlug, whatever it ends up being if it’s in a plug, some type of contained thing for the root system that’s always going to be better than going with bare root. Once you transplant those things they’re just going to root out really fast and they’re going to take off and you’re going to be really happy with the results.

Strawberry: Best Crops For Hydroponics System

Everyone wants to grow strawberries. They’re a crowd favorite. There are two main types of strawberries you need to be concerned about.

  •  Everbearing Varieties Or Day-Neutral Varieties
  • June Bearing

Everbearing Varieties Is Better To Grow

As a grower, everbearing are usually the better strawberries to grow. Because they’re going to produce year-round once they hit maturity, once they get productive. These are all started from the rootstock. You’re not going to start them from seed. You’re going to order in rootstock from a supplier. You’re going to plant that rootstock into your towers.

They grow great in towers. They do very well. You’re going to plant your rootstock in the towers. It’s going to form some leaves very quickly, and you’re going to want to pinch back your flowers for about the first 4 to 6 weeks. What that’s doing is it’s forcing the plant to put all of that energy and growth potential into growing leaves, the vegetative production.

You’re growing leaves your growing roots. You’re growing the biomass that’s going to support your fruit production down the road. After about 6 weeks, you’re going to let it start flowering. It’s going to start producing fruit and it should produce fruit for many months.

Basically, from the time you plant to the time you can start harvesting and selling or eating strawberries, you’re looking at least 2 months, maybe 3 months depending on far you want to push it. The yield is pretty good. The plants that I was doing, I was usually doing about 9 to 10 plants per tower, and I was getting around a tenth of a pound per tower per day. So in a 10-tower system, that’s about a pound of strawberries a day. That’s a lot of strawberries, once they’re really healthy and cracking along. 

pH range wise, these strawberries like high 5’s up to the high 6’s, so 5-6, 5-7, all the way to around 6-7, 6-8. They’ll tolerate anything in that range. Lower pH is usually a little bit better with those.

They Grow Better In Cool Environment 

They do like a lot of light, but they don’t like to be too hot, so keep that in mind. It’s important to put them in a cooler part of your greenhouse. If you overheat them, you’re going to have spider mite issues, and they’re probably some spider mites on these.

You’re also going to have lower yields because they just don’t like the heat. They can get pretty bushy. These one are pretty small. They’re not very large plants. The ones that I’ve grown in the past will actually cover the entire tower. They will get very large when they’re growing in the right conditions, so keep that mind. They can be a pretty heavy crop at the end of the day.

Pests on strawberries. You can have thrips are very common. The one that I’ve had the most with strawberries is spider mites, and these things drive me nuts, but there aren’t a whole lot of great ways to deal with them besides just using a miticide. That an insecticide that targets the mites directly.

So make sure you look around and pick one that’s right for your growing system. That’s about all you need to know about strawberries.

Best Crops for Hydroponics – Parsley

Parsley is a good harvest. A lot of individuals love it and want to utilize it. Anything Italian and notably in a lot of summer salads and dishes where they need a crisp along with a refreshing flavor. Italian large leaf parsley is a good addition to some of those recipes. It is in high demand over the summer but it grows really well year round.

Slow In Germination

As a harvest, it’s kind of slow germination. So we are 3-4 weeks on germination depending on your facilities and it’s about another 3-4 weeks before transplant. When it’s transplanted you’re looking at about 5 months before it starts to become harvestable.

The great thing about this harvest is that you could harvest it again and again over and over. And it will just continue doing so vegetative reproduction as long as you maintain your temperatures on your greenhouse trendy. It likes the cooler temperatures.

A whole lot of parsley in the middle of the winter and it’ll grow quite well through the winter all though. It prefers 12-18 hours daily length you can grow it less and it will grow. In that regard it is a fantastic crop, it’s really simple to start early. Because it’s this continual harvest crop all that investment of time on front pays off. Since you’re able to cut it again and again and again and it just keeps regrowing.

Cool In Nature

Parsley does prefer a PH somewhere between 7 and 6. Kind of a typical PH, it doesn’t like things too super acidic and it does not like things basic. You stick between 7 and 6 and you are going to be really pleased with it. The one thing that’s done like is some of these cooler production temperatures. Even though it’s a really hearty crop and it will endure some of the hot flashes that you might get in a greenhouse where your temperatures spike.

It can be a really fantastic harvest for producers, 1 it’s fairly easy to develop, it requires a little time to have it established, it’s easy to grow, it is very hearty. And it tolerates a lot of different PH ranges and EC ranges but by and large, you are shooting for somewhere between 6 and 7. It’s very happy with just about everything else.

As a harvest, it has got great flavor and especially when it’s grown Hydroponically or Aquaponically with a lot of water. It is inclined to be a harvest that grows very quickly and produces lots of nice large leaves. A lot of the time that the restaurant chefs and the supermarkets don’t even use to watching parsley of the prestige because what they are getting is this kind of wilted unhappy stuff on a truck. It having the ability to offer them a fresh skillet with nice big leaves a lot at one time. They’re very sweet, can be a fantastic thing for you as a small producer.

Low In Cost

Seed is not particularly expensive with the skillet and again. Because it’s a continual harvest crop you do not need to be worried about planting the seed which frequently. That’s a really fantastic thing for producers. The planting you can be doing, the further harvesting you can do means you’re making more money.

There are a lot of different types of parsley, the two most frequent ones are frilled leaf parsley. And there is a range of distinct names in this type of parsley and they’re mainly a garnish. They don’t have the very best flavor, they tend to be pretty tough.

The parsley that is used mainly for cooking is the Italian large leaf. It has got great taste and it can have a very sweet flavor to it. Lots of aromatics which means that fresh it is so far superior to anything that’s been cut for any period of time. It is not particularly prone to fleas.

Another great thing about parsley you don’t have to be concerned about things getting out of hands. I’ve seen aphids on it, I have on occasion seen thrips in certain growers greenhouses with parsley. However, by and large, it is a very hearty crop and you do not have to fret too much about pests.

Best Crops for Hydroponics – Mint

Mint is a really great harvest. It’s in high demand everywhere you go. Bars love it, consumers love it. Particularly during the summer, a lot of items are made out of mint. Because of this, a lot of growers really love growing this crop, and they can get a lot of money from the crop.

You Can Cut It Many Times After Growing ones

Some things to consider mint, if you’re starting from seed, you’re generally like 14, 16 times for germination, another 5 to 6 months, at least, before it’s possible to transplant that seedling. And after that you are looking at, at least 6 months, if not 7 or 8, sometimes, to get it to the point at which you can begin harvesting it, therefore it is a slow starter. The matter is, once it is growing, it is possible to cut it and cut it, and just keep cutting it until it basically gets so big it barely fits in the tower anymore.

In that regard, it is one of these its sort of an investment harvest. A quicker means to do so or a means to speed up that, is to start with cuttings. Cuttings can be an excellent way to go with mint since it rolls out, it is very responsive to grinding, it roots out really fast. And also you can transplant it very fast, and get towers moving really fast. You can also split towers, once they get a little overgrown too so lots of choices there for propagation. As far as the harvest itself, it enjoys cooler temperatures, typically good full sun. We are typically talking a little bit longer length, 14 to 18 hours, somewhere in that range, and it enjoys slightly longer of a neutral pH. so that it does not like going super acidic, as some of the other herbs do.

Mint does pretty damn well in 6, 7, 5, therefore mid 6s, ideally. If you’re running it with a lot of other stuff, you just kind of shoot for the mid 6s, and they stay pretty satisfied. It’s a vigorous grower. It grows really fast once it builds up a root mass. So once it’s some root mass, it will only keep growing, and growing, and developing.

You can cut it back to the crown free of fear of really damaging the plant significantly, it just takes a bit more time to grow out again. In that regard, complete harvests are a total chance with this crop, and then you simply regrow in the crown. Mint seed is not particularly costly, and there’s a great deal of it. Mint seeds, when you buy them, are super, super tiny, and after the mint begins to blossom, it generates a lot of seed.

Not Grow Fastly

The seed is priced pretty well. If you’re starting from seed, you’ll get a good deal of plants from a rather small packet of seed. It’s not terrific germination. It is somewhat slow, and it may be somewhat hard to grow from seed, and that is 1 thing to bear in mind. That’s one reason why the majority of individuals, they may start all their first plants from view.

But, in the end, they always head to cloning their healthy plants, to get the materials for new towers, or fresh plants. This one’s showing just a little bit of a lack, but it might turn a really rich green and some of these bigger leaf varieties. They are fantastic for garnishes. They look beautiful in drinks, and there, great for cooking when you get much bigger leaves.

There’s a good deal less prep work to get the plant ready to use, for chefs and for bartenders, that type of thing. It is a pretty crop. It develops in very thick on the tower, so the towers are appealing. If you are thinking about live earnings, it’s a fantastic crop in that regard, and the taste is actually very good if you receive it. The thing to consider with mint is that a few states make it be a tiny bit more bitter, than have some of those really good aromatic chemicals that provide mint its own flavor.

So you would like to kind of watch your environmental requirements, make sure it’s not getting too hot and remaining too hot, or you will end up with a lot of bitterness. Make certain it’s not growing too fast. Be certain it’s getting challenged every now and then, to find those flavors going. But maybe not so much that it just turns into a bitter mess. It takes a bit of management in certain systems. In certain systems, it grows great from day one, no management in any way, things are just ideal for mint.

About The Bugs

Mint isn’t particularly pest prone. You will see aphids appear from time to time. Thrips can be an issue, here and here. One of the nice things about mint is that it simply doesn’t suffer from a lot of the insect issues that other herbs do. There are a whole lot of varieties of mint. Not all of them are true mints.

You have got your spearmints, along with your peppermints, and your garden mints, and your candy mints. Garden and sweet mints are generally kind of the same thing. Then you’ve got all these novelty things, like chocolate mint, also, I do not even know, there’s a good deal of those. Orange mint, and everyone these different kinds of mint. A good deal of those is really not true mints. A whole lot of people have mint-like flavors, combined with other tastes, but in the end, they’re not a true mint.

Main customers for mint will be restaurants, bars, and grocery shops. A whole lot of consumers really like mint. It is inclined to be sort of a seasonal thing with consumers, but in bars, you can sell mint year round. They are always making beverages with mint. It is super popular, and if you have good mint, you will have no lack of customers, when it comes to bars. Grocery stores also sell a lot of mints. If you have seen mint there, it does not work nicely with being trimmed, and being stuck in a clamshell.

So in the event that you walk into a store with a dwelling tower of mint, then you can provide them a really compelling product to be selling to their customers. Since the stuff from the clamshells, it is a shadow of what it was. It doesn’t have the flavor, doesn’t have the appearance. It seems like crap. Whenever somebody has the chance to cut their own live brand new, fresh mint, they are going to take that chance.

A Beginner’s Guide To NPK In Hydroponics

What does NPK stand for? If you’ve ever bought any fertilizer or nutrient solution, you will see these three numbers clearly displayed somewhere on the packaging. That stands for nitrogen, phosphorus, and potassium. N, P, and K. If you paid attention during high school chemistry you should hopefully know this. So these three numbers here represent the percentage of nitrogen, phosphorus, and potassium that is available in this fertilizer.


These three numbers will always be in that same order of N, P, and K. And should be clearly displayed on just about any fertilizer you will buy. Will every nutrient solution come with all three of these nutrients include? It is for a complete and balanced fertilizer.

But this is not always the case. Frequently you will often see blooming fertilizers which will have no nitrogen at all. So they will just display a big fat zero for that first number. Nitrogen, phosphorus, and potassium. These are known as the three essential macronutrients for plant growth. Without these, your plants will not be able to thrive. 

Benefits Of These Nutrients For Pants

  1. Nitrogen, that is the green up nutrient. This is what makes your plants green. It makes them grow big and it makes then grow strong. Nitrogen is listed first because it is the absolute most important nutrient in your solution.
  2. Phosphorus, it is essential for blooming. It helps with all reproductive phases of your plants. So if you want a lot of blooms, a lot of flowers, if you want to produce a lot of fruit or a lot of seed, you want phosphorus in your solution.
  3. Potassium, it plays a very essential role in plant photosynthesis, as well as CO2 uptake and activation of plant enzymes. As well as regulating water uptake within the plants. It is also essential for building strong healthy stems, as well as producing strongly viable seeds.

Since they only list these three numbers, N, P, and K on the front of your bottle of nutrient solution, you may think that these are the only nutrients that your plants need. Unfortunately, you would be wrong. There are several micronutrients which play pivotal roles in the production of plants. They are just used in much smaller quantities, not anywhere near as much as N, P and K. That’s why they concentrate on these. But most complete and balanced fertilizer solutions will also contain other micronutrients and other elements in the solution for complete and total plant growth.


You may notice that these three numbers do not add up to a hundred percent. These are percentages of your solution. So what is in the rest of your solution? If you’re using a liquid, a lot if it’s water. You gotta have a carrier agent for these nutrients. Also, there are the essential microelements. That makes up a portion of the solution as well. Another thing to bear in mind is that these are not pure elemental forms of nitrogen, phosphorus, and potassium. It has to be available in a form in which the plant can take it up.

So there are other elements and other weights that are combining to make up the rest of this solution. For example, if you look at phosphate, it is listed as the phosphate molecule, not pure elemental phosphorus. It is P2O5, is the actual molecule that plants are using to take up.

An important thing to note is that there are several different sources for these nutrients. If you look at the back of this bottle of Dyna-Gro, for example, there are actually two sources that makeup that 9% nitrogen. There is 2.9% ammoniacal nitrogen, which as you can imagine, would be ammonia derived, and then there is 6.1% nitrate nitrogen. Just to reiterate, these are not pure elemental formats of these nutrients, there are several different molecular compounds that can be used to supply these essential nutrients to plants.

Quality Of Nutrient

The quality of that nutrient will depend on which compound is used, and using which compound for that nutrient will vary greatly depending on what you’re end goal is, Whether you’re in soil or hydroponics, and many other factors. So a source like Dyna-Gro is synthetically derived. You may be wondering to yourself if there is an organic option. The answer is yes, there is, but there are some trade-offs with going organic in a hydroponic setup. Some potential trade-offs with organics are that you need a very strong microbial community in your nutrient solution. The microbes are what drives organic growing, they cycle the nutrients and make them available in a format that plants can use, much like these nutrients in a synthetic solution are already available in that format.


So if you don’t have a strong microbial community an organic solution really won’t work for you. Another drawback of it is it takes time to the culture that microbial community. So if you go organics, it’s always recommended to let your reservoir set up and culture and begin to cycle those nutrients so that by the time you do have plants into your system, the nutrients are available for plants. If it has not had time to culture and cycle those nutrients, there will basically be no available nutrient for your plants.

One final drawback of organics and hydroponics is some solutions do stink. Putting a highly microbially active solution into water, you can wind up with lots and lots of anaerobic microbes that produce horrible, horrible smells in your grow room. I know this from experience. If you’ve spent any amount of time looking at fertilizer or nutrient solutions, you’ll notice that these numbers that they display on the package can vary quite a lot.

So what does that all mean? How do you know what you need to grow what you want to grow? The solution is actually quite simple. What we have here is Dyna-Gro Foliage Pro. It’s what we like to use a lot for lettuce, greens, anything leafy producing a lot of green growth. And if you were paying attention earlier you’ll notice I said nitrogen is essential for green leafy growth.

If you look at the numbers on here, 936. Nitrogen is your nine, it’s the highest in concentration there. High in nitrogen fertilizers are essential for producing lots of green leafy growth. That is mostly what you will be using in a ZipGrow system. If you look at our lettuce formula, however, you will notice it is very high in phosphorus and potassium.

And if you have any knowledge on growing you might say, Ethan, this looks like a bloom formula for flowering and fruiting plants. Why would you use it on something green and leafy like lettuce that you don’t want to bloom, you don’t want to produce seeds, you don’t want to produce flowers? The answer with this is, it is used as a two-part solution in our auto dosing system. So we will actually supplement this base formula with calcium nitrate, which provides the calcium as well as additional nitrogen.


So that reason alone is why you may see some nutrient solutions which may not have any nitrogen at all in them because you are supposed to supplement it with a two-part solution. Also with blooming, nitrogen isn’t super essential, so when plants get into a blooming phase they need lower concentrations of this. Some manufacturers may choose to not put any it at all.

So if there is any confusion on what is a good idea for what you want to grow, just remember high nitrogen is good for greens, leafy vegetables, and lettuce, anything like that. High phosphorus, high potassium is essential for flowering and fruiting plants like vegetables. A lot with understanding what the basic N, P, and K, nitrogen, phosphorus, and potassium ratios are in your fertilizer or nutrient solution.

How To Spot And Solve Nutrient Deficiency In Your Hydroponics System

Nutrient Deficiency 

Nutrient deficiency is going to be one of the main factors that will affect the growth appearance and the taste of your plant. It is very important to understand what it is basically what you are having is a plant is not getting enough of a certain nutrient. It will display symptoms be it banal chlorosis enter van or chlorosis necrosis anything like that. That will give you a clue as to what is lacking in your plants’ diet common deficiencies that you will see within your plants. 

Nitrogen, Phosphorus and Potassium are the three major macronutrients, they’re the big players when it comes to planting health. So nitrogen phosphorus and potassium will be very common nutrient deficiencies that you will see they will tend to show themselves very quickly within the plant. Another common subset that you will see nutrient deficiencies intend to be a group of micronutrients calcium magnesium and iron Tensho nutrient deficiencies especially in hydroponics. Plants require a certain level of nutrients which we measure as EC. This level of nutrients is very important as well as the ratio of nutrients to one another.

For example, the ratio of nitrogen phosphorus can make a big difference if you’re trying to grow a green crop but you’re using a fruiting or flowering fertilizer which will have a high phosphorous to nitrogen ratio. You’re probably going to see nitrogen deficiency so for example if we have too much of nutrient A on hand in the solution. Nutrient B can become locked out based on chemical reasons certain reactions that will happen within your solution that will either convert nutrient B to A different chemical format or sit to precipitate out of solution which makes it unavailable to your plant.

How do you tell if your plant has a nutrient deficiency, fortunately, each and every nutrient that a plant requires has a specific function in relation to the plant’s metabolism and growth processes. So if it is deficient these systems within the plant will begin to suffer and will display outward symptoms that you can recognize as long as you have the education to do. So often the effect that a nutrient deficiency has on these metabolic and growth processes within the plant will display a physical symptom. Some of these symptoms that you need to keep an eye out for are chlorosis which is yellowing of the foliage. You also have necrosis which is foliage depth.

So either drive around crispy foliage or mushy black rotten foliage in addition to chlorosis and necrosis. You need to be on the lookout for various factors such as where these are occurring versus new growth is that old growth does it affect the middle of the leaf doesn’t start at the tip of the leaf and move backward. You will also see combinations of necrosis with chlorosis you may see a necrotic ring surrounded by chlorosis.

Mobile Nutrients

You may see a Berkley tip that fades to chlorotic tissue past that plant nutrients are either known as mobile or mobile within the plant so a mobile nutrient is a nutrient which the plant can actually physically move through itself when it experiences a deficiency. So mobile nutrients will be moved by the plant from older growth slower growth on the plant to newer growth at the growing point. This is basically a survival mechanism and it keeps the growing point of the plants alive. Nutrients which are immobile within the plant as you can imagine the plant cannot move them around. So the first place that you will see deficiencies from an immobile nutrient is on the new fresh growth.

How To Treat Deficiencies

It’s always best to have a good nutrient deficiency diagnosis team which will give you a breakdown where you can look at a symptom. And it will say go air B and it’ll eventually lead you on that tree to what is deficient in your plant. If you are unsure it is always best to consult with your local County Extension agents they will have great knowledge to help you out with nutrient deficiencies. It is best to avoid Google on this one unless it is from a peer-reviewed source usually from a university otherwise doodle image searches. Who knows what you’ll come up with you may wind up with very wrong information on your nutrient deficiency.

Once you have found out what specifically is deficient within your crop. The first short-term step is to treat it by supplementing with that nutrient that is lacking. This can be done in a number of ways by increasing the level of that in your nutrient reservoir. You can pull your feed with many of these nutrients although you must be very careful with foliar feeding follow the manufacturer’s recommendations on your nutrient supplements there. If you do not if you mix it too high of a concentration.

You can burn your plants really badly and possibly lose your entire crop long-term solutions to fixing nutrient problems involve either changing your nutrient mix switching to a new supplier or making regular supplements for this nutrient. For example, we commonly see iron deficiencies in our system because we run UV filtration UV filtration causes the iron to precipitate out of solution. So we add iron on a regular schedule weekly basis best to use a calendar and keep it regular.

When your plant is experiencing a nutrient deficiency it is sick but it is not dying you can bring it back to good health. And when you diagnose and begin to treat this deficiency you won’t see proper healthy growth on that tissue where you notice deficiency a lot of times. You will still see that leaf will be ugly it’ll be burnt it’ll be chlorotic but your new growth will flourish and it will be healthy.

Nitrogen Deficiency

Our common nutrient deficiencies are and some quick little diagnosis tips on the most common ones. The biggest player in plant growth is nitrogen. It is the green up nutrient it’s what makes you have lush verdant growth and big strong plants it’s the most important one. This is the key takeaway is to learn how to recognize nitrogen deficiency.

So for nitrogen deficiency, it is a mobile nutrient within the plant if you were paying attention earlier mobile means that the plant will move it from old growth to new growth under deficiency symptoms. Nitrogen will cause complete and total chlorosis of the leaf veins tissue between the veins all of that and it will typically start from the tip of the leaf on older growth and move backward and end. And start moving up the plant another common symptom with nitrogen deficiency is very stunted growth.

It will be much smaller than it should be for its age so we have an example right for nitrogen deficiency if you notice this leaf right here was an old leaf probably one of the first true leads on this lettuce plant. And you’ll notice just about everything on this leaf the veins the surfaces in between belief veins are all chlorotic and yellow. So it starts with the oldest growth and move back from the tip of the leaf down all the way back and will eventually move up to leads above it.

But this is a classic example of what nitrogen deficiency looks like this is not the particularly best example. Because there also may be some magnesium deficiencies.

Phosphorus Deficiency

It is another very common one. It can be a little bit hard to diagnose and that it is typically not going to display outward symptoms very noticeably or very fast. Typically what you’ll first see is a general overall stunted growth and the plant is just lacking in health. But you’re not going to notice those nitrogen deficiency symptoms unless it is also deficient in nitrogen as well another common symptom of phosphorus deficiency. That will occur in a little bit more advanced of deficiencies in plants is that lead will begin to turn a little bit darker or purple in certain instances.

This is not true, phosphorus deficiency this is supposed to be a purple plant. But we are using it as an example in this situation of that darkened coloration and stunted growth with a phosphorus deficiency. So you will see purple or a little bit of red sometimes dark or bronzing of the leaves and bear in mind when diagnosing phosphorus deficiency that yes indeed some plants are supposed to be purple or supposed to be red. It’s not always a great end indicator. This is the time where you really need to know your plant variety before you go in and try and diagnose.

Potassium Deficiencies

The last of the big 3 4 plant nutrient deficiencies is potassium, it will exhibit somewhat similar to phosphorus in that. It won’t be outwardly visible it’ll be a little bit sneaky. At first in the early stages of deficiency, you will just kind of notice the plant will overall be lacking in health a little bit stunted as your potassium deficiency progresses. It will begin to show a little bit of chlorosis starting on the leaf margin right around the edge of the leaf and unlike nitrogen instead of moving back in towards the middle of the leaf. And a v-shaped taking out the entire leaf calcium will tend to stay concentrated right around that margin. And it will move from the tip all the way out along the edge the back of the leaf and will leave the middle portion of the leaf typically untouched.

Sometimes you will see a bit of necrosis as well along with that chlorotic tissue along the margin phosphorus and potassium much like nitrogen are also mobile nutrients. Which means that the plant will move those nutrients from the old growth to the new growth.

So you will see these deficiencies just like nitrogen on the older growth starting at the bottom of the plant and moving up the plants to newer tissues. These next three nutrient deficiencies are very common in hydroponics. These three nutrients are calcium, magnesium, and iron.

Magnesium Deficiencies

Magnesium is a very common deficiency in hydroponics. That is typically why we recommend if you are running a multi-part nutrient solution that you supplement in a little bit of magnesium sulfate just because they tend to go deficient in hydroponics. It’s just something that plants tend to do so what magnesium does is it is also a mobile nutrient which means you will see your deficiency start on the older lower growth. First, it can look very strikingly similar to nitrogen deficiency. So what you will really begin to notice with magnesium deficiency is that the older leads will go chlorotic.

But this is what you would call intervene old corrosive so if you notice the veins are still green but the tissue in between the leaf veins is chlorotic. And the interesting thing with magnesium is it doesn’t just turn yellow as it does with nitrogen and Flora’s is caused by other nutrient deficiencies. Your plant tissue will turn almost completely white magnesium is also a great deficiency that you can supplement with foliar feeding. It will respond very quickly to this it is also one of those deficiencies that when you do correctly that old chlorotic growth is going to stay nasty and chlorotic looking.

Iron Deficiency

The first example that we have of an immobile nutrient deficiency and this is a very common one is iron deficiency. A lot of times even if your nutrient solution has iron in it. It’s probably not quite enough and this is due to a number of reasons. Some basil plants one of the reasons a lot of iron deficiency in basil is it is very iron inefficient. It just does not utilize this nutrient very well. But it is an immobilization see at the growing tips of each branch instead of the older leaf below it. It causes inter vanil chlorosis much like magnesium where the veins still stayed green. It is an iron inefficient plant it just doesn’t move it very well.

Russian red kale is another big one that I’ve really noticed that just does not use iron very efficiently. Another reason you may see iron deficiencies in your system is if you are running a UV filtration system if you are you running UV filtration. Then what happens is that ultraviolet light causes a chemical reaction with that chelated iron in your solution. And it makes it precipitate out of solution. So basically it will become a solid again and sink to the bottom and it is in a plant in available form at that point. So the plants, the iron is still there in your solution but the plants just can’t use it they can’t take it up it’s one of these odd situations. Because it’s very common.

And we typically add iron once a week to our system when we do these additions we unplug our UV filtration system for a period of 24 to 36 hours. And that allows the plants to take up this iron that we’ve supplemented with another great way around it is foliar feeding. Iron is a great one to foliar spray with and it has very quick results and that bypasses the whole UV filtration loop of that system.

Calcium Deficiency 

It is extremely common in hydroponics particularly if you are growing in indoor environments. There is a specific reason to that but before I get to it I will show you the deficiency symptoms to look out for calcium. So calcium is not a mobile nutrient within the plant so you are going to see this deficiency displayed typically on the newer growth of the plants and the older growth won’t be affected quite. So much but calcium is a great one for showing necrosis and that is dead burnt crispy little leaf tissue out on the margin of belief.

It will start from the very tip of the leaf which many people will confuse with pit burn which is a symptom of adding too much nutrient or running your EC at too high of a number. So it is very easy to confuse with that but with health and efficiency, it will kind of tend to be splotchy along the margin. It won’t start at the tip and then a little over there just kind of be random spots along the edge. So calcium is not a very mobile nutrient within the plants so the reasoning why you see calcium deficiency a lot in indoor environments or greenhouse environments.

Because you are highly skimping on your HVAC system you need a lot of airflows you need to maintain the appropriate temperature and you also need to control your humidity. If your airflow is low and you just don’t have a lot of air moving past the leaf of the plant calcium will actually not move within the plant out to the growing tip of the leaf. So since it’s not moving there it is deficient there the more airflow you get past belief the more your plant is going to respirate the more.

It’s going to move liquid within its xylem and phloem in the plant tissues. So it’s going to carry it out to that growing tip when you have better airflow past it another common problem that will compound on this typically. If you don’t have great airflow you’re probably going to have high humidity. I recommend trying to control your humidity at very maximum of about 60% anywhere in the 40 to 60% range should be completely and totally fine for your plant growth getting higher than that number or much lower than that number will have adverse effects. And definitely being higher on that number will cause calcium deficiencies like this one.

And another key component of it is that lettuce is a cool weather crop so in the summertime when you see that HVAC systems are having a really hard time keeping up in your grow room. Then you’re not getting adequate airflow you’re not getting adequate dehumidification. These are really times of the year when you will see huge calcium deficiencies. And lettuce is one of the biggest crops to display these calcium deficiencies. It can be such a big difference that we have noticed within rooms for ventilation.

The Complete List Of Vegetables That Are Perfect For Hydroponics

Almost any plant or vegetable will grow hydroponically. The concerns you have to ask yourself are: why do you wish to grow it? What is your reason for owning a hydroponic garden? How large is your unit? How many components have you got?

In the event, you intend to make utilize of your soilless garden for a hobby or to pass the time, go right ahead and enjoy. Plant whatever suits you, don’t be hesitated to experiment. The level of knowledge about hydroponics today is around the same as this in mathematics two decades back. We have to learn about the niche, and you also may provide help to others. Even the pros are continuously learning and experimenting. In my opinion, the only criterion is always to have fun. Try out everything.

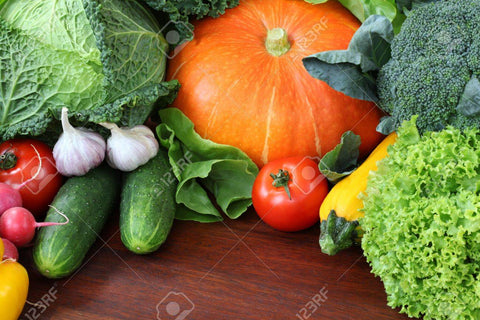
For those who are very serious in regards to the crops they would like to harvest, then my advice would be always to stick mostly to vegetables. During hybridization, it’s chiefly the salad vegetables that industrial growers have altered until significantly of these initial nutrient value and flavor are missing. Plastic lettuce, swampy tomatoes, soggy radishes, and hollow celery are just a few examples.

Of course, you will be restricted to the amount of space, time and money you need to dedicate to the whole notion. Practical concerns must enter into play here. By way of instance, six tomato blossoms, each producing six pounds of tomatoes in the sixteen by twenty-four inch container. The container is the much more efficient use of space compared to sixteen stalks of corn.

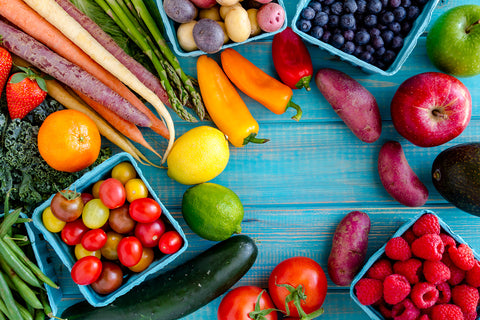
The following guidelines are given to aid the home hydroponic vegetable grower. (A few fruits that could be grown hydroponically have also been included.) Information given on nutrient requirements is useful for those people who are growing on their own. There are some general things to keep in mind. When a few species of veggies are grown in one tank and also an industrial nutritional supplement is properly used, caution must be taken not to upset the balance. Also remember that while seeding or transplanting into your soilless garden, the whole area may be employed for growing and the restriction on how far apart to place your seeds is conditional upon the physiological atmosphere around the plant that we need to grow. For example, a pea blossom climbing up a string needs much less air gap compared to a bushy tomato vine.
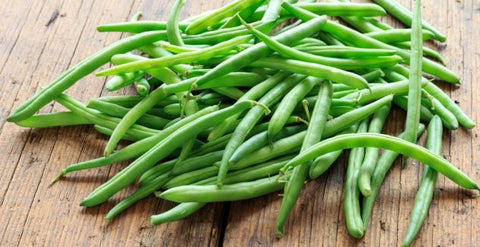
BEANS

Beans can grow winter or summer, indoors or outdoors. In winters, grow bush beans indoors. During summers, grow pole beans outdoors. Pole varieties could be tied up and grown vertically. They are sometimes planted quite near with each other (roughly six inches). As their title suggests, bush beans tend to just take more place. Beans need less oxygen than other plants, however, demand considerable amounts of potassium, phosphorus, and sulfur. Limas do not produce as big a crop, plus they even take more time to grow.
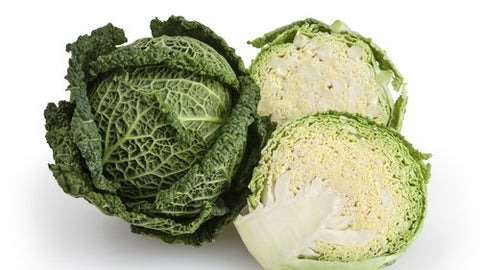
CABBAGE

I have grown cabbage without letting it head. Like you would for leaf lettuce, pick on the leaves for dinner and let it keep growing. Plant six inches apart. Cabbage requires cool weather and also elevated levels of all nitrogen, iron, and phosphorus.
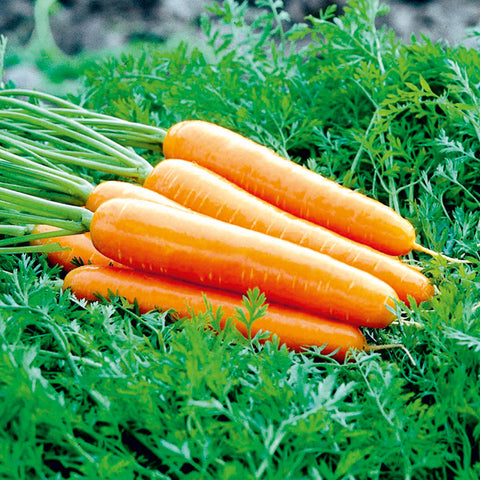
CARROTS

Gourmet carrots are better to develop than the ordinary varieties because of the depth of the growing medium. Plant about one and a half inches apart. Potassium and phosphorus are important.

CAULIFLOWER

I have experienced lousy luck with cauliflower for good reasons. It’s extremely prone to temperature variants. If you’re growing cauliflower with other plants, it’s better to develop it together with plants with moderately cool requirements. Plant approximately 8 inches apart. Nitrogen, iron, and phosphorus are required in larger quantities.

CELERY

This really is an excellent salad vegetable to grow. Celery does best on the cool side, also it hates temperature extremes. Plant about four inches apart and have the young stalks and leaves for your salad. It’s the best around two months and pencil thin. By the time it is four months old, it is useful only for sauces and stews. Do not uproot an entire plant simply cut off a number of stalks in one time. Larger amounts of sodium and chlorine are all usually important.

CHARD

This really is an excellent crop which could be harvested much like head lettuce. Keep removing the outer leaves for your food. Plant them four inches apart and maintain cool temperature conditions. Chard is a great veggie cooked like spinach.

BEETS

Root vegetables are ideally grown in vermiculite with a relatively little soaking. Merely a slight covering of haydite or gravel should be used to minimize algae buildup. Many varieties of beets do well. They thrive in cool temperatures. Plant around a few inches apart. Grow smaller beets, and the majority of these, for increased tenderness.
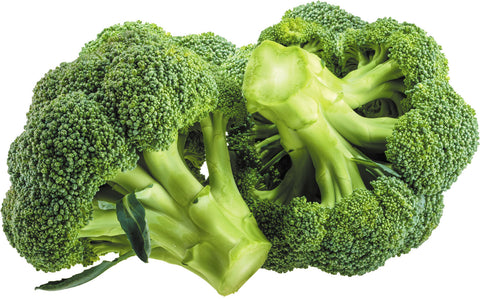
BROCCOLI

Several experts assert this is a fantastic crop. Transplants ought to be used, spaced seven inches apart. Broccoli enjoys cool weather (60°F, 16 °C). Huge amounts of nitrogen, iron, and phosphorus is extremely important.

CORN

Corn is a potential crop, however, it is not hot, but because of the little produce. Plant midget corn about six inches apart.
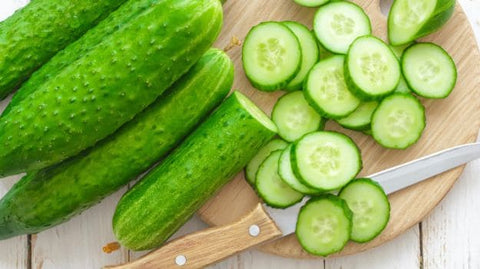
CUCUMBERS

Along with lettuce and tomatoes, this is a favorite commercial crop. In the event, you don’t wish to either cross-pollinate, plant the English or seedless type. These develop well indoors or in greenhouses, but if you grow them outdoors and insects do the pollinating, you can end up getting some unusually shaped cukes. They like hot weather and also direct sunlight and are sometimes vulnerable to mold.

EGGPLANT

This can be a possibility, however, not a very favorite crop. Eggplants are sluggish germinators and like hot weather. They’ll grow larger in case you pinch a few of the blossoms away, allowing just a few good fruits per vine. Excessive amounts of nitrogen, potassium, and phosphorus are required, however, lower the nitrogen, if possible, after the fruit has already formed.

LEEK

You’re going to receive a superior harvest by the addition of increased amounts of potassium and nitrogen and extra amounts of phosphorus.

LETTUCE

Boston and New York are very popular heading varieties, but leaf lettuce yields a much bigger harvest. If you do grow head lettuce, then get rid of the outer leaves for salads without even needing for this to head and you can increase your harvest. Grand Rapids along with Salad Bowl is wonderful foliage lettuce, but remember Romaine (Romagna) for Caesar Salad. In six weeks or less, it is possible to have an abundance of lettuce. But, caution needs to be taken over the first two weeks. Lettuce will bolt (small leaves will grow to a lengthy, stringy stem) with inefficient high or light temperatures. Varieties that don’t bolt like Black-Seeded Simpson, Endive, Escarole, and Batavia. It would be wise to cut back to your nutrient medium a bit with this particular harvest. Lettuce enjoys cool temperatures (50-70°F, 10-21°C) with high nitrogen levels. Plant them approximately four inches apart, near the borders of your planter so that their heads hang over them.

MELONS

The growth techniques for melons are much like those for cucumbers. They like to be in warm conditions both day and night. High humidity causes mold, thus keep them very well ventilated. Honey Dew is still a superb cantaloupe, of course, should you prefer to try watermelon, take an early variety such as Sugar baby. Remember to Cross-Pollinate. Tie up the vines, and when growing indoors, provide plenty of lighting.

ONIONS

Spring Onions or Green Bunching are popular. They ought to be sown rather heavily, at one-half inch distance. Requires larger amounts of potassium and nitrogen.

PEAS

All varieties succeed in hydroponics but try Snow Peas with their sweet and flavourful edible pods. Work with a whole good deal of plants to acquire several great harvests. Connect up them or allow them to mature a trellis. Plant three inches aside and keep under cool temperatures.
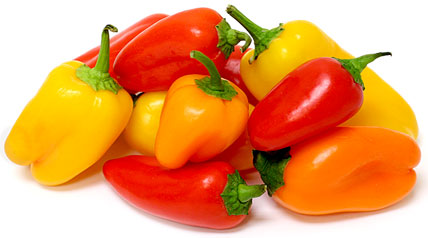
PEPPERS

All peppers have been good to grow: Green Bell, Yellow Banana or Chili. Grow them together or separately. Peppers like more of hot weather. Plant them six inches apart and watch for damping off. Peppers are somewhat more difficult to grow indoors than out because they want high light levels which aren’t consistently attained with indoor light. Our experience is the fact that peppers and tomatoes don’t like each other, the tomatoes stop growing when grown alongside peppers.

RADISHES

Many forms are all suitable, however like beets, it’s far better to cultivate them in vermiculite and plant roughly one and one-half inches aside. Keep the vermiculite around half as damp as possible. Radishes bolt readily, therefore be certain they’ve ample mild and cool temperatures. Water merely ought to be used to the very first couple of weeks when radishes are being grown with on their own. Generally, radishes are grown in the worst part of a garden, but in hydroponics, they have the very best of everything, and if you aren’t very attentive you’ll get a lot of tops before the root has a chance to grow.

SPINACH

Spinach is a speedy crop. Plant two to three inches apart. Cool temperatures and a great deal of nitrogen are essential.

SQUASH AND ZUCCHINI

These are grown exactly as cucumbers, however, remember just how much space a zucchini plant occupies and then plant eight to nine inches apart. Pinch the plant off after seven or six sets of leaves to preserve the energy closer into the root and to guarantee to fruit.
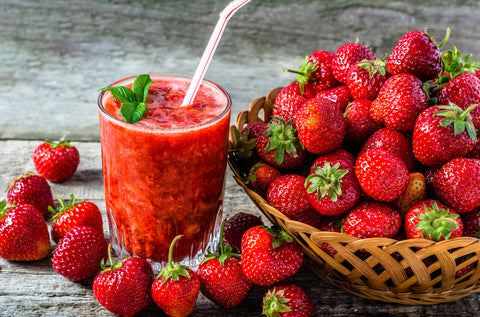
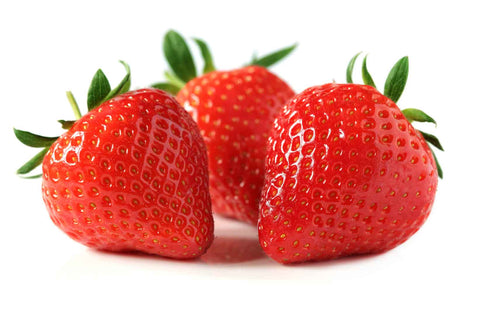
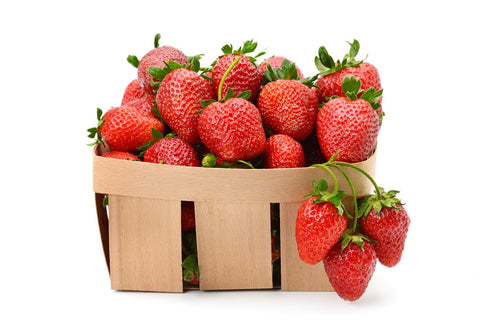
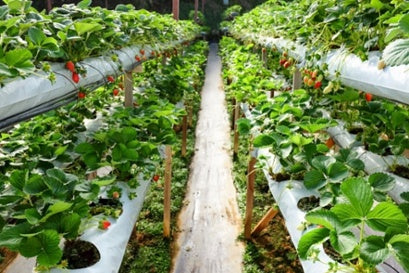
STRAWBERRIES

These really are good for distributing, however not too economical if you aren’t intercropping. Try to get a self-pollinating variety like Ozark Beauty. Plant them eight inches apart and sit back for quite a long time. Strawberry plants, like asparagus, need two to three years to mature.

TOMATOES

Although the tomato is really a fruit, it’s usually counted among the vegetables. This is among the better & most satisfying hydroponic plants. Indoors you should seed bush or patio tomatoes, therefore your plants will probably stay well beneath your lights. Sometimes you can expand staking tomatoes; hut the bush variety remains simpler to work within hydroponics, especially in case the vines still haven’t finished growing whenever you could be ready to bring them in at the end of the summer.

Seed tomatoes for early and late outdoor harvest. Plant the seeds for your initial tomato crop in February or even March indoors under lighting and move them outdoors in April or May.

OTHER VEGETABLES

There are a number of other vegetables you might like to plant.

Basically, you can grow anything outdoors, regardless of how far its own vines can spread. Indoors you’ll be able to just grow everything you are able to light up, and you also are far much better off sticking into bush, stunt or patio varieties that will always be under your lights. Other forms of plants might have to be pruned when they expand or when their vines grow too far. We suggest that you just concentrate inside on these plants like lettuce, tomatoes, other salads, vegetables, and herbs – all of the things that offer nourishment at a time when needed the most and are the priciest from the supermarket.

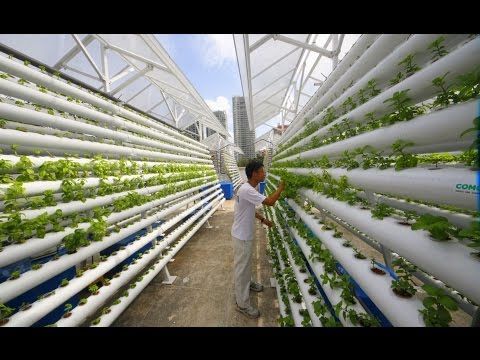
Outdoors it makes sense to use the available hydroponic growing area to its fullest. This may be done by intercropping and outcropping. Fast growing plants amongst slower growing types. A fast-growing crop, including radishes or leaf lettuce, would have shown up and have been harvested by now the space and time is needed for a crop that is slowe-growing.

Outcropping suggests letting your crop spread out from the planter, up, down and sideways. The layout showed the following provides you with a good idea the way to acquire growth and yield much more compared to the accessible growing area seems to allow.

A few reminders are in order. If you want to grow root vegetables, like carrots and radishes, you will find just two things to keep in mind. First, irrigate them to the first week or two after planting with simple water just, until they have proven themselves rather short, stocky plants. Only add nutrient to the water. Second, you must not grow such a thing with a root substantially longer than three inches as a result of the fairly shallow depth of the medium. This isn’t a problem with round radishes, simply the icicle variety, and there are still short, barrel-shaped carrot varieties over the seed shelf too.

Companion Planting

Plants do not produce a sound, and you’d think their world was all peace and harmony. Not so – among the plants, there are certain enemies and friends. Some crops safeguard one another from insect infestations, but others offer shade to their friends. Still, others simply like each other and grow better if they neighbors. In hydroponics, you will probably want to know at least two plants that grow happily together.

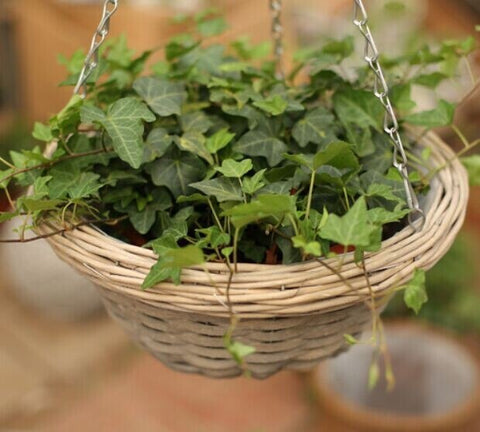
Garden Bouquets and Houseplants

Anything which blossoms within a dirt garden or flower pot will perform much better in a hydroponic planter, summer or winter, from asters to zinnias. The same holds true for house plants. They’re children of the tropics and live within our latitudes mostly in a state of lasting hibernation. Both seeds and transplants perform exceptionally well in hydroponics, plus it is amazing to see them develop in a comfortable environment in substantially the exact same way since they would in the tropics. Houseplants utilize not as much water compared to vegetables or flowers, but on account of the exemplary aeration properties of a hydroponic medium, your plants can never be over-watered. This is definitely the usual source of death one of potted house plants. When sending flowers, you’re probably far much better off using varieties that grow up to 9 or even 12-inches as of hydroponics they will grow twice as large. Flowers that rise more than 1-2 inches from land gardens will be the overly unwieldy grown hydroponically. Lots of rules that apply to veggies will also apply to house plants.

Get rid of the plant from the container and then lightly wash off the dirt out of the roots using cold tap water. The cold water has a tendency to anesthetize the plant against jolt. Insert a sufficient growing medium for the container in order for the plant will probably sit at an identical depth as formerly.

 Use plain drinking water at the container for 10 to 14 days. This forces the main platform to distribute and grow in its hunt for the nutritional supplement in its brand new environment. Commence the nutrient option at 10 to 14 days, or sooner in the event, the leaves become pale green or yellow. Mark your calendar whenever you begin using nutrient answer and put it to use for a single calendar month. The switchover to plain water for a month, then flushing out the planter with scarcely lukewarm water to be sure it stays sweet and fresh for your plant life. This removes salt and mineral buildup, which appears as a white crystalline formation, even from the medium. Allow it to empty and replace fresh water. Do not utilize water out of the water heater because it’s overly plump. Keep on to alternative nutrient remedy one month together using water the next.

If you are transplanting a flowering plant, it’ll probably shed most of its buds and blossoms, however, in all likelihood it will still live.

Vertical Hydroponics Farming – Horizontal Plane VS. Vertical Plane Setup

Why stacked systems make zero sense for indoor growing. Those of you that are familiar with indoor growing. The most common form is to take basically plant production planes of plant production and then stack them one on top of another. 

The goal is how we’ve kind of used some little math tricks to grow a lot more in a lot less space and reduce our labor costs by an awful lot. Four by eight feet, this is typical because this is kind of the standard size for a lot of different types of materials. Some people will actually double up on this and they’ll go eight by eight. So they’ve got eight by eight this is eight feet by eight feet.

Horizontal Plane Production

The lateral space use, we can just stack these things in to end from. Really we want to figure out what the space use efficiency of this particular model is. So we have a four by eight square this is just kind of the standard block and then we have a four-foot aisleway. So for a total of eight by eight the reason that this is four feet wide this aisleway. This is the plant production area this is Iowa. And the reason is four feet wide is because we have to get a scissor lift in there because as soon as we go above about two growing planes.

We have to have a way to get people from the ground up to where the plants are now to meet municipal code in almost anywhere you go and also to be able to allow these scissor lists to fit down the aisle. We have to have a four-foot aisle so this makes a total of 64 square feet we have 32 we have 32 square feet of growing space over 64 square feet. So this total is 64 square feet and the growing space is 32 that’s a ratio of one half of a square foot of productive space per square foot of warehouse space.

Things get a little bit better because we’ve doubled this up now there are all sorts of other problems that come with having an 8×8 growing area right a lot of that is co2 depletion in the middle. And access to plants in the middle the ability to actually monitor pests to monitor disease to actually take care of the plants in the middle of this mass. But we do get a little bit better spacesuit sufficiency so with our four foot Isle. We’re basically looking at a total of 64 square feet of the growing area out of 96 square feet of exercise. That’s not feet that’s square feet right so 96 square feet of total floor space.

You’re saying own 8 that this is this ratio is 0.66 all right we’re a little bit better we’re at 2/3 of that total floor space is being used well. And You’re saying hey, we’re going to stack these things up on top of each other.

And calculate four tiers so four levels of these stacks beds and the reason I’m doing that is that above four you start to lose money. I haven’t seen an operation I’ve seen a lot a lot of operations and it’s very hard to find places where you’re not breaking even or losing money above tier four which means. That tier five – you’re 60 or 70 or eight however many other tiers you can stack in that warehouse space. You’re probably losing money on them so you probably shouldn’t have them in the first place. If you’re losing money on those tiers.

Tier four is the one that we are going to calculate, these tiers are usually about three feet tall. So three to four feet tall is kind of the average that gives you enough room to cultivate your plants to avoid disease. And problems to get good circulation to get good co2 penetration from your higher concentrations. You’re looking at 3 to 4 feet per tier that gives you usually about two feet to grow the plants 18 inches to 2 feet to grow the plants. So if we multiply this out bytes, what we’re looking is by 4 tiers times 4 that is 2.0.

So we’ve got basically two tiers there and if we multiply this by before we end up with something around 2.6 4 so what this number represents the number of square feet of growing area 2 square feet of warehouse space. This is 2.4 square feet of growing area 2 – 1 foot of warehouse space. So that’s two points four to one this is 2.0 to one you might be thinking oh that’s pretty good. We’re able to by going for tears on a 4 by 8 setup.

We’re able to double the amount of production. We can do in a warehouse and that’s kind of true until you think about the fact that you start losing money above that first year well actually not losing money. It is the opportunity cost. So the first year is really cheap harvest really cheap to maintain.

You’re just standing there you’re dealing with this stuff like this second tier. You’re standing on something most likely to get access to deal with stuff. So your labor cost goes up by about 25% so the tier after that it goes even higher. And when you have to start getting in a scissor lift it goes up significantly. You’re talking about 60% more labor involved with dealing with racks and trays harvesting planting monitoring caring for the plants spraying. Those plants dealing with those plants period as soon as you step a foot in a scissor lift.

That is the opportunity costs of additional tiers are pretty high when you kind of count them out over the course of the year. So that’s what we get this is when we’re dealing with four. This is four stacks like that right that’s what we’re looking like in our warehouse. So how going vertical actually changes this so shifting this to a vertical plane. Because pant production and we’re growing plants. On this side, we’re growing plants on this side.

Vertical Plane Production

The other model is vertical plane production. We can only produce plants on one side right. This space is taken up by lights and it’s hard to get air.

And why vertical plane production is more productive per square foot than any other kind of production so we’ve got our ratios two point two points zero two one for our four by tracks and two points six two one for our eight by tracks. The ratios that we’re working that we’re comparing against. That both of these require the use of scissor lifts they require the use of people going up and down. And these pieces of equipment they require buying the equipment kind of a pain. so let’s think about this we’re going to take an 8 by 8 rack so vertical plane instead of looking at this from overhead.

We’re looking at this from this side. So this is a vertical 8×8 rack it would look something like this if it were with our equipment. We have 64 square feet of growing area. But we have it on this side and we also have it on this side for a total of 128 square feet of growing area. The way we do it is we hang lights. So they’re shining on this rack shining on that rack and we’re able to repeat. We operate on six-foot centers. We can go down to like three feet if necessary with certain crops. But we typically like to operate on these nice wide corridors that allow us really easy access. When you see these you realize we could easily take a foot off of it 18 inches off of it two feet even off of that. And make it even more productive.

The six feet we have 128 square feet to six by eight. So we’ve got 128 over 48 square feet. That is roughly 2.7. That is our new ratio and that’s 2.7 these racks are about 8 9 feet tall and a single person standing.

We’re beating our Fortier basically the four tiers that are profitable to actually make a profit on. We’re beating this ratio standing on the ground and the total height on this is maybe nine feet. We’re like at half the height that we would have to go to with a stacked rack system and half the height. We could go higher with this if we wanted we’re at half the height and we’ve got a bigger number.

If we go together say we go down to five feet all of a sudden we’re talking about 200 128 square feet over 40. And that’s a little over three what’s the exact number 3.2. If we tighten it up by one foot which we can easily do all of a sudden. We’re in the threes that’s an insane ratio if we tighten it up further if we make our aisle whit’s two feet. So we’ve got a two-foot wide rack two feet in the middle all of a sudden we’re up to 4.0 so then we’re at let’s see eight times four that’s 128 128 over 32 4.0.

We’re quadruple the amount of productive space as. Square footage in our warehouse or in our indoor growing facility. So you can see why this is the model that we are interested in we are not interested in these models we’re not interested in tiny numbers with big costs. No one who’s in business should be interested in tiny numbers of big costs.

Build facility after facility after facility based on a faulty mathematical premise. And so if you actually do the math if you actually analyze the space use. You will find that vertical plane production is the only way to grow indoors. It is the only way that you can reduce costs and grow more in less space. I have seen farmer after farmer invest in these tiered systems they spend a lot of money they spend a lot of money to build a warehouse.

And I’ve seen a lot of armors lose a lot of money this is such a huge potential industry so much opportunity. So many people spending money on tiered systems when we know that tiered systems are based on a faulty initial mathematical premise. We care about farmers we want to see farmers you better we want to see farmers make more money. And we want to see indoor growing take off but until people start embracing just kind of the basic math behind the reasons that we grow.

This way the reasons that our upstart farmers grow. There’s going to be no well it’s going to precede the industry we’ll proceed but it’s going to grow but it’s going to be growing at a much slower pace than it could grow. It’s going to be serving fewer communities there will be fewer farmers that are profitable.

So to wrap everything up when you’re doing floor space calculations you need to take your product space. That’s the total amount of productive area in your growing environment and you need to compare that to your floor space or the number of square feet of warehouse space you have. It’s really important to calculate in aisle space because aisle space is nonproductive space but it still costs you money. And you have to calculate in your total productive space per square foot of warehouse space regardless of whether it’s a grow bed or an aisle way for access.

So that’s what we did and the results two to one 2.6 to one. The worst ratio we have is about 2.7 to one it only improves so you can do all these calculations yourself. Supersuit for easy calculations to do productive square feet to floor space square feet. This is your ratio of productive square feet to flair square feet of warehouse space.

The Complete Guide To Hydroponics pH Management

Managing a successful hydroponics setup involves a proper knowledge of metrics and the use of sensors and taking notes. Having the right pH is important for healthy growth of plants and herbs. This guide tells you everything about pH management.

The term seems scientific but actually, pH is just the relative acidity or alkalinity of the solution. In hydroponics, we’re thinking about determining the pH degree of water before the nutrients have been inserted into it, then checking the degree of the nutrients. The pH in your system will probably change almost hour by hour at all times, and without a computerized business, the system would not be possible to control. However, if you are able to keep a sensible flat pH a few times per week, it could be very helpful to your plants.

Determining pH

When we take a scale of 1 to 14, the center stage, or neutral position, is 7. Everything neutral is alkaline and everything below is still acidic. To ascertain precise pH degrees, every complete number is divided into ten portions. So we now have 6.8, 6.9, 7.0, 7.1, 7.2 etc on. When developing a few types of herbs or veggies inside one container, you will probably do best from the somewhat acidic variety of 5.6 to 6.5, because it is within this range which the nutrients will be most available to the plants. For example, at 7.0, that will be the most acceptable range for vegetables, plants are still capable of taking such elements as nitrogen, potassium, and phosphorus. At such a level, though, the trace elements are getting dropped for the crops; the numbers of iron, manganese, boron, copper, zinc, and molybdenum are generally trimmed in half. So when the pH is over 7, be on the watch for hint element problems, like the ones caused by the macronutrients potassium, phosphorus, and potassium.

Both the 2 most frequent methods of determining pH amount are by index (litmus) newspaper and also by indicator answer. Each method is simple to use, easily obtainable and satisfactorily accurate to your home grower. It is pretty unlikely your water distribution will likely fluctuate from pH.

Several parts have a drinking water pH of 7.0 to 8.2. A superior business nutrient will probably possess a small effect with the figure, down it closer to the desirable 5.6 to 6.5 range. With regular adjustments of nutrient solution, pH should not become a major problem.

Besides the water pH and the consequence of nutrient upon it, you can find just two other crucial variables to consider. One is that the hardness of the sport and the 2nd would be the pH of this growing medium in conjunction with drinking water. If you failed to find a water analysis if coping using nutrition, then you need to definitely get you when discovering pH. The analysis will tell you exactly how hard your water is.

Other factors impacting pH are climate, what plants you are growing and how much nutritional supplement each plant makes use of. You’ll find a number of combinations of the variables, which you will see throughout the encounter.

Adjusting That The pH Amount

If your nutrient solution falls outside the 5.6 to 6.5 array, Try out the next treatments:

  • To a solution that’s overly alkaline include 1 tablespoon of white vinegar every three gallons (3.6 American liters ) of water and verify the pH amount daily per day. The waiting period needs to do with the fact that it sometimes requires a few hours to your own vinegar to do the job through the solution. Using vinegar is just a temporary measure. Over the entire, it is too unstable to be adequate for at least the usual few days.
  • To an alternative which is far too acidic only add baking soda. It’s difficult to define the number here due to wide variations in drinking water quality and nutrient balance. You might take 1 tbsp to about 3 gallons of water. 
  • If you would like to become accurate, try adding malic acid into a solution that is too alkaline. It’s less dangerous compared to vitamin commonly employed by farmers. Phosphoric acid used closely is nearly harmless. You only have to make certain to wash it off right away with baking soda and water in case you spill any on yourself.

Throughout recent tests on water using a pH of 8.0 and also a hardness variable of 136 pieces per thousand, 0.1 millilitres of phosphoric acid had been usedto a gallon of water. The pH was paid down to 6,8. As an example, if the hardness was 172 portions per million, an individual would add about 0.15 millilitres of their acid. You will find 5.0 millilitres to at least one teaspoon along with 1-5 drops to 1.0 millilitre. Therefore, in adding 0.1 millilitres you are using a half drops. Once more, permit your response blend together with the acidity and examine the pH approximately 8 hours after and again twenty-four hours after.

Still another way of adjusting the pH level is via the use of dolomitic lime. It also creates potassium a lot more available to your crops. Moreover, lime provides the calcium and magnesium which may be missing on your own water supply.

The optimal method to apply dolomitic lime is to sprinkle it equally throughout your drainage or expanding medium. If you’re utilizing a coating of vermiculite for drainage under the developing medium, it will be the place to employ it. One tablespoon a couple square ft ought to be adequate, however, because in a number of different hydroponic”principles,” you will need to gain encounter to ascertain the specific quantity that is required on the human body. Lime shouldn’t be extra always; it must be implemented only when you’re certain your plants need this, or after cleaning and firming the device entirely.

Run pH evaluations using the lime with mixes of water, nutrient, and growing networking and record the details in a single log. Otherwise, you might discover your growing medium is extremely acidic if you are using some type of lava rocks or enlarged oil shale. During this kind of situation, if you’re using this be cautious of the quantity of lime.

Plant Preferences

You can find vegetables which can be categorized as acidic lovers and those that do well below more alkaline conditions. Should you develop your hydroponic system to the stage at which you’ve got a lot of tanks in a greenhouse, for instance. And also you are in possession of an alternative herb or vegetable in each and every tank. Then it might be advisable to investigate and follow up on the individual needs of every plant.

Water Source

As mentioned earlier, many communities have an alkaline water source. Make sure and protected; have your water assessed. Try collecting rain, if your supply is composed made of poor excellent. Some alterations will be mandatory in areas where the water isn’t relatively neutral. Pure drinking water free of mineral content may require developments of calcium and magnesium. Utilizing the dining table 3, keep a close watch on your own plants to get nutrient troubles, specially iron deficiencies.

Adjustments in pH level are somewhat more complicated when utilizing a commercial nutritional supplement as you are able to more readily upset the nutrient stability. Consult with a regional agricultural professional in case you are feeling the need. Possibly for all those growers who have plain water complications. The only solution is homemade nutrients, however, I would decide to take to other manners.

Some Easy pH Assessments

Here Are Some tests you can run that Will Allow You to Fully Grasp some of the prime pH factors, along with acquiring a few expertise:


  • Execute a pH test
  • Execute a pH check on your water adding nutrient
  • Perform a pH test on your rising moderate after adding water
  • Perform a pH test in your water, nutrient and growing medium together
  • Try to obtain phosphoric acid (visit the Resource List in the back of this book) and also do tests inch to 4 again, but in each instance include the necessary quantity of acid to acquire the product range you would like.


Do not forget you need to adjust the pH of the drinking water before adding nutrient. If necessary, fix once all over again after comprising the nutritional supplement. In all instances of pH adjustment, record your test results and scanning from a log. This info should give you a lot of those fundamentals that you may need in order to keep up a satisfactory pH degree.