
Discover The Benefits Of Silicon Nutrition In Your Plants!

Potassium Silicate is easy to use the liquid that provides supplemental potassium (3.7%) and silicon (7.8%). The latest research proves that plants benefit in many important ways from supplemental soluble silicon. These benefits include greater tolerance of environmental stresses, such as cold, heat, drought, salinity, mineral toxicity or deficiency, improved growth rates and resistance to insects and fungi. Soluble silicon promotes natural fungal defense mechanisms in plants, significantly reducing and, in many cases eliminating entirely, the need to use fungicides. Silicon deposited in epidermal cell walls makes plants resistant to small sucking insects. The resulting increased mechanical strength in epidermal cell walls enhances leaf presentation and stem strength. Soluble silicon enhances metabolic functions and improves pollen fertility, fruit and flower count.

SILICON INCREASES RESISTANCE TO PATHOGENS


Silicon deposition in the epidermal cells of plants acts as a barrier against penetration of invading fungi such as powdery mildew and Pythium. Following a fungal infection, greater deposits of silicon are found around the affected plant tissue showing that silicon is selectively accumulated at the site. Silicon is also deposited in the cell walls of roots where it acts as a barrier against invasion of the stele by parasites and pathogens. Test conducted on cucumbers, melons, and tomatoes determined that soluble silicon must be available to the plant during the period of infection by fungal spores. The silicon is deposited at the sites of infection to form stronger, harder cell walls to deter the fungus. Silicon also stimulates the production of polyphenolic compounds which form part of a plant’s natural defenses against fungal infection and insect attack. Silicon is rapidly bound in leaf tissue and will be deposited in a non-translocatable form within 24 hours. Therefore, a continuous source of soluble silicon is very important to combat pathogens. This can be from constant feeding in hydroponics or from retention in the growing medium with soils or soilless mixes.

In some plants, foliar applications appear to lead to even lower rates of disease probably because deposits of silicon compounds on the leaf surface promote physical barriers to the infection process. Foliar sprays of soluble silicon have also been shown to be effective for control of aphids and other sucking insects on many plants. Epidermal cell walls containing silicon deposits act as a mechanical barrier to the styles and mandibles of sucking and biting insects. In addition to the silicate deposits in the leaves, the intracellular content of silicic acid also acts as an effective sap sucking inhibitor for many insects.

SILICON INCREASES METABOLIC RATES AND STRESS RESISTANCE


Research shows that silicon benefits plant in the following ways:

  • improved resistance to wilt
  • resistance to water stress (heat and drought)
  • enhanced leaf presentation resulting in an improved light interception
  • enhanced reproductive growth
  • Increased tolerance of excessive phosphorus, manganese, sodium and aluminum concentrations, zinc deficiencies and cold temperatures

Silicon, deposited in the cell walls, forms a protective layer reducing transpiration through the outer cells. Silicon deposits in the cell walls of xylem vessels prevent compression of the vessels under conditions of high transpiration caused by drought or heat stress. Temperatures much above 90 degrees Fahrenheit cause plants to virtually cease their metabolic functions because water is lost through transpiration faster than it can be replaced via the plant’s root system. This results in harmful increases in intracellular mineral concentrations that inhibit plant functions. Increased levels of silicon in cell walls reduce transpiration loss caused by higher temperatures thus allowing continued metabolic functions at higher temperatures. Plants wilt less, resist sunburn and are generally more tolerant of heat stresses. Cuttings and plugs are more tolerant of the stresses encountered during root formation and potting up as a result of decreased transpiration.

Silicon has also been shown to result in higher concentrations of chlorophyll per unit area of leaf tissue. This means that a plant is able to tolerate both lower and higher light levels by using more of the available light. Moreover, supplemental level s of soluble silicon has been shown to produce higher concentrations of the enzyme RUBP carboxylase in leaf tissue. This enzyme regulates the metabolism of carbon dioxide and enables the plant to make more efficient use of available levels of CO2.

Silicon deficiencies often are indicated by malformation of young leaves and a failure of pollination and fruit formation in many cases. Plants with silicon added to the nutrient formula also show a decrease in leaf and flower senescence. The shelf life of cut flowers, specialty pot crops and plugs is also extended. Leaves are thicker and darker green compared to those grown without soluble silicon.

Powdery Mildew In Indoor Gardens And Hydroponics


INDEX

1. What is Powdery Mildew?

2. Will PM Kill My Plants?

3. What Products Can I Use to Control PM?

4. How Can I Protect My Plants from Powdery Mildew?

5. How Long Will It Take to Get Rid of PM?


In the last year, indoor gardeners have reported a drastic increase in powdery mildew, a disease more prevalent to outdoor gardeners.

Mild temperatures and wet weather, inherent to the West Coast, increase the likelihood of powdery mildew occurring in the indoor gardening environment.

Compiled below are the most frequently asked questions (F.A.Q.’s) we’ve received about powdery mildew. The answers will help protect your plants resulting in a productive, healthy garden.

What is Powdery Mildew?

Powdery mildew (PM) is an indigenous, external, parasitic, fungal disease that attacks the leaves, stems and flowers of the host plant. PM is very common in our region and its airborne spores are easily transported to indoor environments. If the right conditions exist spores will germinate and spread rapidly through a grow room. To identify the disease look for a white, talc-like mold growing on the leaves, stems and flowers. Growth may appear in isolated patches on the leaves or cover the whole leaf entirely. The once established PM may cause irregular coloring and texture (russeting) of the leaves followed by yellowing and necrosis (death) of the entire leaf beginning at its margins.

Will PM Kill My Plants?

Powdery mildew alone will not result in the death of the entire plant. The disease first affects the outer surface of the plant followed by destruction of the outer most layer of plant cells. This in turn inhibits the plants’ ability to retain moisture. Infected growth may die but, if properly controlled, new growth will continue. The disease does not spread systemically. However, the plants growth will be stunted and become vunerable to other diseases and pests.

What Products Can I Use to Control PM?

The most effective treatment of PM is the use of an approved fungicide or products that have plant protective properties. The following products have proven to be effective:

* Sulphur – Sulphur Dust 90% WP, Safer’s Defender
These natural products are safe to use and have excellent contact with fungicidal properties. Sulfur has a moderate residual effect and is also an effective miticide.

* Benomyl – This wettable powder has extremely low toxicity with moderate contact and systematic (whole plant) fungicidal properties. Benomyl has a moderate residual effect.

* Potassium silicate – This soluble form of silicon has moderate contact fungicidal properties when used as a foliar spray (1-2 ml per liter of water). When watered into the plant Potassium silicate has excellent disease preventative properties and increases plant tolerance to environmental stress.

* Neem Oil – Nature-oil, Einstein Oil
Cold pressed neem oil has moderate fungicidal properties and creates a physical barrier to PM. It also provides excellent protection from pests and increases growth rates.

* Magnesium Sulphate – MgSO4, Epson Salts
When applied as a foliar spray (2.5 ml per liter of water) MgSO4 provides good plant protection and stress relief but only low fungicidal properties.

Registered pesticide: follow label instructions regarding rates and intervals.

How Can I Protect My Plants from Powdery Mildew?

The most effective way to prevent the development and spread of PM is environmental control. The four critical environmental factors are:

1. Humidity: maintain a humidity level less than 65%.
2. Air Circulation: good air circulation throughout the garden.
3. Light Penetration: high light levels at lower plant heights.
4. Air Exchange: constant air exchange (ventilation) will remove airborne spores from the garden preventing infection of unaffected plants.

Judicious pruning of lower branches and leaves may be necessary for proper air circulation and light penetration.

How Long Will It Take to Get Rid of PM?

Be patient and diligent! Depending on environmental conditions and the product chosen to fight the infestation, it may take up to 3 applications to completely rid the garden of PM. To hasten plant recovery any growth completely covered in mold or showing signs of necrosis should be removed and disposed of. Feeding the plant with Potassium silicate has proven to increase the plants’ resistance to PM so that new growth will be protected.

Regular use of other products that have plant protective properties (Einstein oil, Benomyl, Epson salts) will also help prevent a return of the disease.

Preparing Plants For Taking Cuttings


INDEX

1. How do I select a stock plant?

2. During what stage of growth should a cutting a be taken?

3. Can I take a cutting from a plant in flower?

4. What should I feed my plants prior to taking cuttings?

5. What hormone/stress relief products can I feed my plants prior to taking cuttings?

6. Will these preparations benefit the stock plant following the cutting harvest?


Growers often neglect to provide the stock plant with proper care before taking cuttings. Correct stock plant preparation will increase the survival rate and shorten the rooting time of the cutting. Also, healthy, new growth will likely develop sooner.

How do I select a stock plant?

Choose a strong, healthy plant that has the characteristics you want to encourage in future crops. Some of the most important characteristics of plant selection include:
genetic maturity; growth traits; and disease resistance.

1. Genetic Maturity: the stock plant, if started from seed, should be at least 3 months old. Taking a cutting from a plant that was a cutting from the original stock plant (second generation) is also acceptable but keep in mind that the new plant (third generation) will not make a good stock plant.
2. Growth Traits: size, vigor, abundant flower and fruit production, taste.
3. Disease Resistance: select only healthy plants that have shown resistance to disease. Avoid the temptation of taking a cutting from the healthy growth of a diseased plant.

During what stage of growth should a cutting a be taken?

A plant should be prepared for cutting during the active vegetative growth stage. At this stage the plant’s growth hormones necessary for rapid root development are present.

Can I take a cutting from a plant in flower?

Yes, but a cutting taken while the stock plant is flowering will force the cutting to revert to a vegetative state. This causes additional stress, slowing growth, and development. Rooting may take up to three times longer when the cuttings are taken during the flowering cycle. The cutting may not have enough stored nutrients or carbohydrates to survive.

What should I feed my plants prior to taking cuttings?

While the stock plant is in the active vegetative growth stage feed it with good quality, all-purpose or high Nitrogen fertilizer. One week before taking a cutting feed the stock plants with low nitrogen, high Phosphorus flowering fertilizer. The flowering fertilizer will lower the amount of stored nitrogen in the plant and increase the number of stored carbohydrates necessary for the production of roots. Spraying the foliage with water daily will accelerate this process.

What hormone/stress relief products can I feed my plants prior to taking cuttings?

It is important that growth-enhancing supplements be present in cuttings prior to introduction to grow mediums. The best way to ensure the presence of these products is to feed the stock plant 1 week before the cutting is taken. This method has proven to accelerate the rooting process. The following products are known to enhance growth rates and will benefit the health and prosperity of both the stock plant and cutting: (choose one for best results).

Nutri-Boost – A plant growth hormone which has been developed to greatly enhance the root growth of all plants under stress. It contains a botanical mix of vitamins and auxins which promote root growth. These provide a stressed plant with the enhanced natural ability to replace roots damaged by stress and create healthy new roots.

Growth Plus/Nitrozyme – These products are natural marine algae extract plant food containing many of the nutrients that plants require for vigorous healthy growth. They are also rich in cytokinins, a natural plant hormone that accelerates cellular division and growth during all stages of development. When used as a foliar spray these products may be combined with other plant supplements.

Power Thrive/Thrive Alive – Made from all natural kelp meal these products are rich in naturally occurring plant nutrients and hormones. These products are also fortified with vitamin B1 which has been proven to increase a plants ability to overcome stress and promote vital plant systems.

Vita Max – A scientifically created formula designed to enhance, increase and protect plant growth. It contains over 60 minerals, vitamins, microelements and natural plant growth hormones used together to benefit and bolster the internal health and appearance of all plants.

SUPERthrive – No one, except the creator of this product, really knows exactly what is in SUPERthrive Vitamins-Hormones Solution. It is known that this product works very well at increasing growth rates, plant productivity and reviving plants under stress.

Will these preparations benefit the stock plant following the cutting harvest?

Definitely! A prepared stock plant will recover faster from the stress of heavy pruning. New growth will be strong and healthy thus allowing the grower to use the same stock plant for future cutting harvests.

Everything You Need To Know About Hydroponics

The Exciting Science Of Hydroponics

In the 1800s, physiologists discovered that plants absorb much of their nourishment from mineral nutrients dissolved in water. The nutrients plants need are not normally present in water, but are absorbed when water comes in contact with soil and then carried into plants through their roots. This was an important discovery because it showed that soil itself is not an essential part of plant growth. Rather, it simply acts as temporary storage for the minerals that plants need.

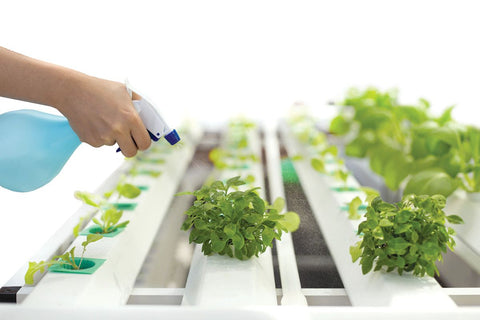
Hydroponics works by artificially introducing these nutrients directly into a plant’s water supply. The most common method hydroponics gardeners use to do this is to purchase one of the many brands of concentrated nutrient solution on the market, mix it with water and regularly feed it to plants using whatever hydroponics technique is preferred. This completely eliminates the need for soil and helps ensure that each plant receives the optimal level of every essential mineral nutrient.

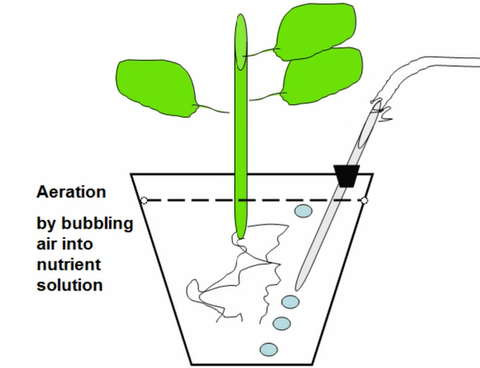
Plants can obtain the air they need in a number of ways. A good way to achieve aeration is to use a porous growing medium that traps air bubbles (such as vermiculite). Other options include constantly circulating the water in the system and even removing the plants’ roots from the water at regular intervals.

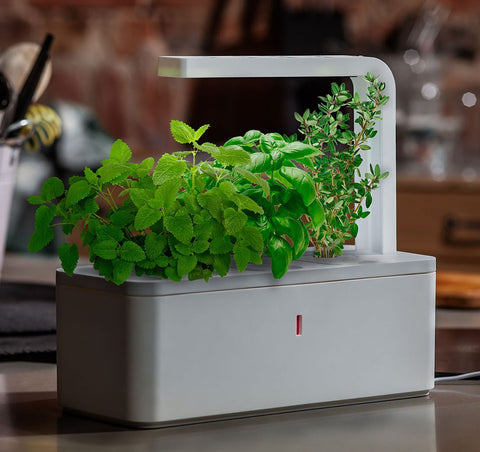
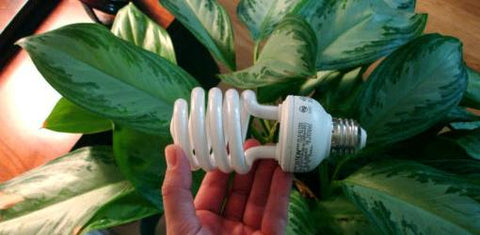
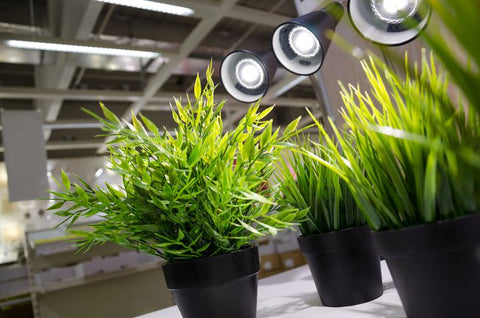
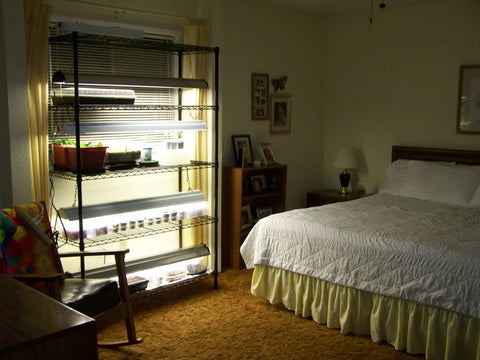
Artificial lights are often used in hydroponics systems – sometimes as the only light source and sometimes to augment natural light. The use of artificial lights makes it possible for plants to be grown indoors on a year-round basis.

Why Is Hydroponics Superior To Soil?

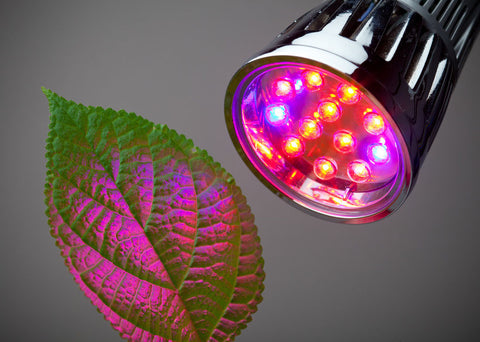
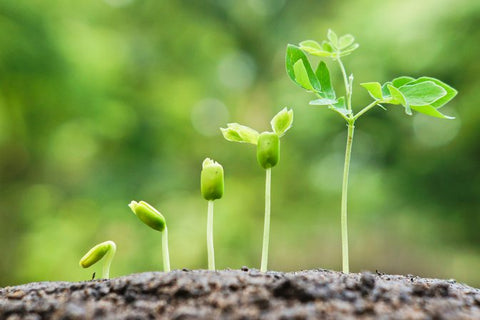
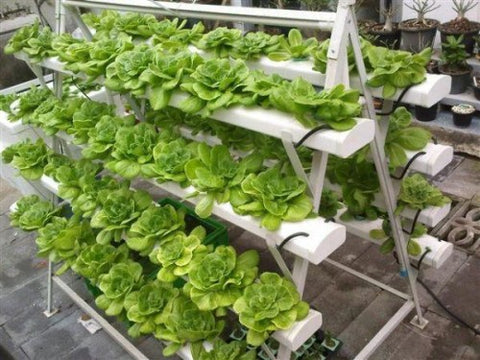
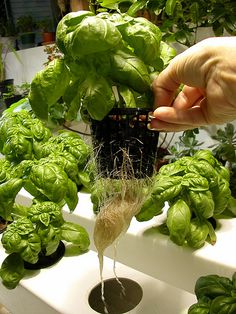
One of the main reasons hydroponics is so popular is that it produces healthier plants than soil-based gardening. This is because hydroponically-grown plants can focus their energy on processes that benefit the development of healthy leaves, flowers, and fruit. Plants grown in soil expend a great deal of energy on root growth. Their roots plunge down into the soil, searching for water and using up nutrients that otherwise could be put toward upper leaf development. In a hydroponics system, plants are always provided with easy access to water and nutrients, so they do not have to expend much energy on root growth. The result of this is that hydroponically-grown plants are able to develop at rates that are unheard of in soil gardening.

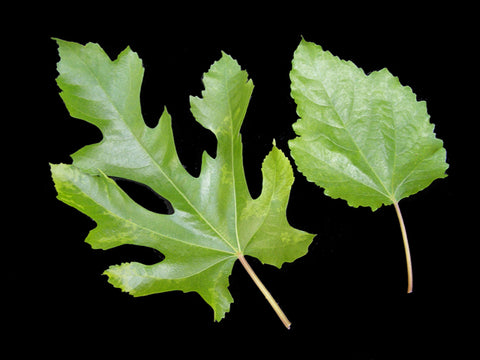
Any plant that grows normally in the soil can be grown hydroponically. However, some will perform better than others depending on the technique and equipment used.

Is Hydroponics New?

No, hydroponics is most certainly not new. Hydroponics has been around for centuries and has been used worldwide in many different countries for the production of food. A good example of its age is the use of hydroponics in the gardens of Babylon.

What Is Hydroponics Used For?

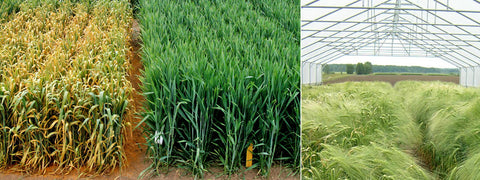
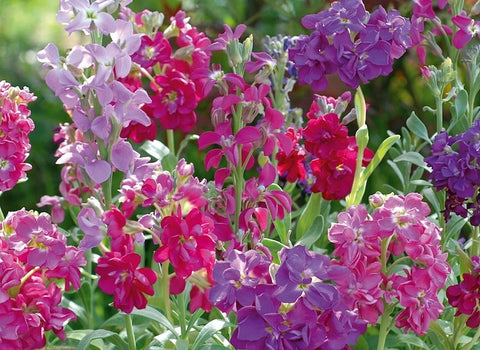
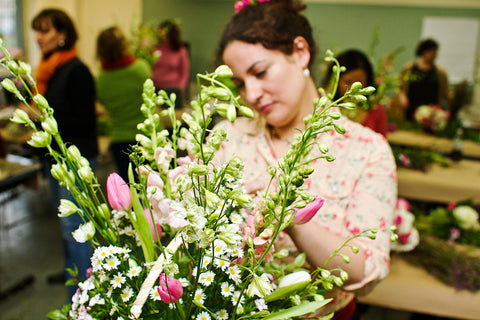
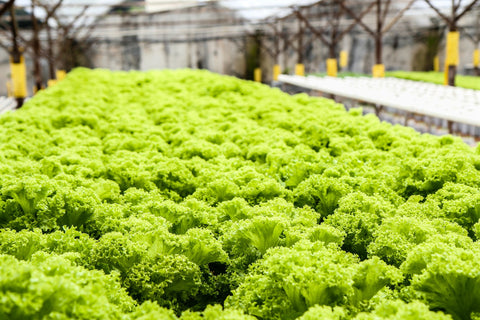
Many people often ask, what is hydroponics used for. Well, it’s quite simple as you can grow almost anything you desire. Vegetables, herbs, peppers, and flowers are all grown hydroponically and regularly supplied for the public to consume. Your weekly trip to the supermarket will provide you with many items that are grown hydroponically by large commercial companies and there are many restaurants and homeowners that nowadays use hydroponics to grow their own fresh produce.

Is Hydroponics A Reliable Method Of Cultivation?

Hydroponics is now becoming the most popular method of plant cultivation around the world, as it is the most reliable method for a regular source of fresh food to be produced, even NASA have used hydroponics as a means to raise crops in outer space, it really is out of this world.

What Methods Are There For Hydroponics?

Hydroponics is to supply a nutrient-rich solution to the inert growing media and roots to feed the plants and then re-circulate or run the excess solution to waste. There are various methods for hydroponics that are used and below are the main methods for hydroponics cultivation, which nowadays have also formed many hybrid hydroponic systems.

 1. Aeroponics

Aeroponics Growing Systems are designed to support your plants in the top of the system, usually in mesh pots to allow the roots to be suspended below in the dark in a sealed container or tank and misted or sprayed constantly or regularly at timed intervals with a nutrient rich solution. Excess solution will drain from the roots and system and re-circulate back into the main storage tank for later use. Aeroponics is an extremely clean and efficient way to grow and requires very little growing media to support your plants, and with the large amounts of oxygen available to the roots, it is also one of the quickest methods of plant cultivation as well.

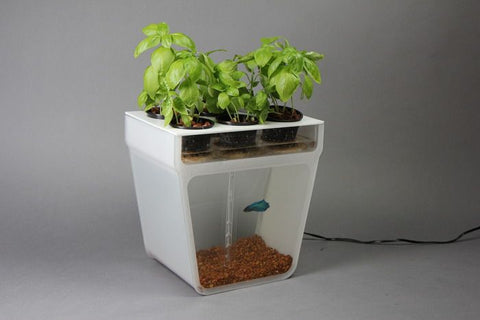
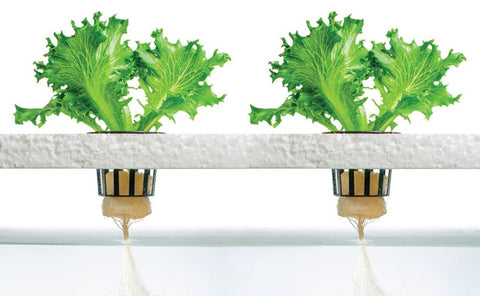
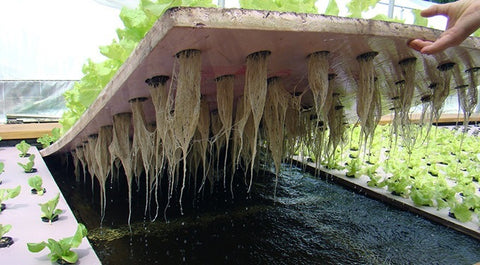
 2. Deep Water Culture – DWC

Deep Water Culture is a very simple, yet very effective method for hydroponics. Plants are supported in the top of the system and the roots are suspended below in the dark sealed container or tank and submerged into a deep solution of water and nutrients that is constantly aerated and highly oxygenated by an air pump and stone. The flow of bubbles into the solution and around the roots allows the plants to flourish, and with a constant supply of water and nutrients, they grow very quickly. DWC is becoming a very popular method with growers, as it requires very little growing media and it is an easy way of growing with hydroponics.
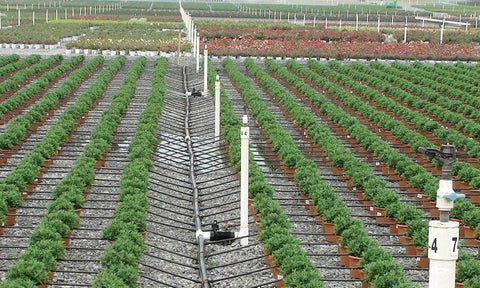
 3. Drip Systems

Hydroponic dripper systems are a favorite with many growers as they are very easy to use and they are also very reliable. Plants can be grown in pots, trays or slabs and irrigation feed lines will be placed into the top of the media to drip and deliver the nutrient solution directly where it is required to go. The solution will drain through the media to feed the roots and any excess nutrient solution can be re-circulated back into the main tank or it can be run to waste. A great example of a hydroponic top feed dripper system is a Drip Potz System, which is capable of re-circulating the nutrient solution back into the main tank, or it can be run to waste.

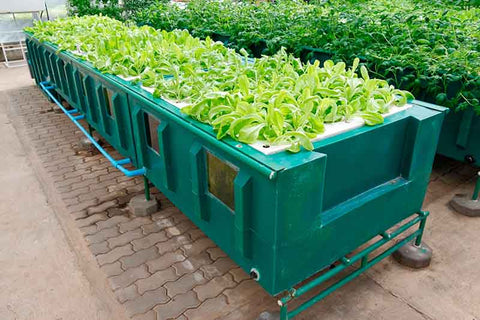
 4. Flood & Drain – Ebb & Flow

Flood & drain systems do exactly what they say they do, which is to flood the system with a nutrient-rich solution to moisten the media and roots to feed the plants, and then they drain pulling air back into the media. Flood Potz Systems are a good example and these even combine DWC. As the Potz is flooded an air stone connected to the bottom of each mesh basket aerates the solution, media, and roots to provide the perfect environment for the plants to flourish, a failsafe method that provides the ultimate yields as well.

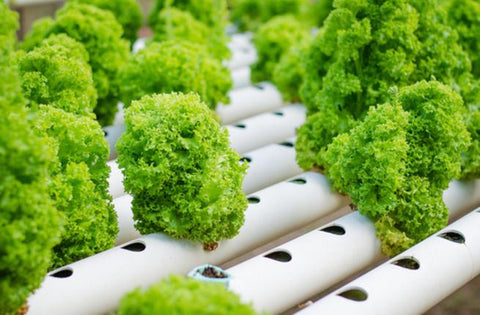
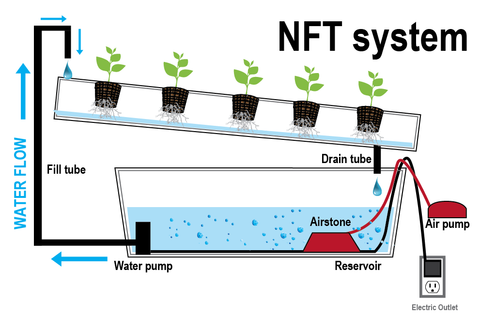
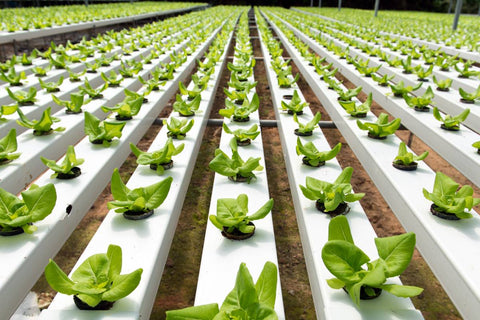
 5. Nutrient Film Technique

NFT is probably the most popular method used for hydroponics. NFT Growing Systems use a sloped top tray to support and grow your plants on, and this tray is placed onto a tank or supported with a stand and a tank. A pump is placed into the tank to deliver your stored water and nutrients up into the high end of the top tray and with the slope, it will slowly fall across the tray and plant roots and back into the tank and re-circulate. Plants are usually grown in Rockwool blocks, which are sat onto the top tray when a good root system is established. A piece of correx (plastic sheet) is used and holes are cut out to position your plants on the top tray, the correx prevents the light penetrating your roots and affecting growth.

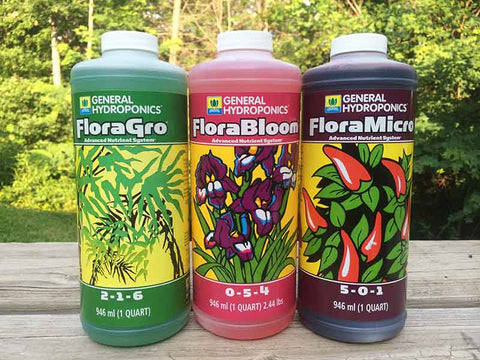
What Are Hydroponics Nutrients?

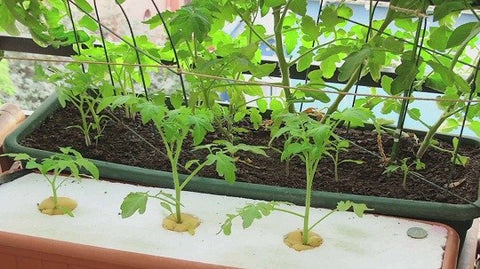
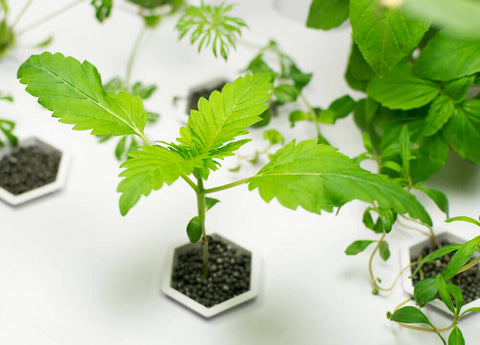
When plants grow outdoors with Mother Nature to help them along the way, they obtain natural minerals that lie beneath the ground through their roots to provide food for them to grow. Hydroponics growing media contains no nutritional content that can feed plants and also the water you supply, so the correct proportion of elements required for plants to grow and also produce flowers or fruits is provided into the water that is supplied to the roots to feed them.

Hydroponic Nutrients will contain macro-nutrients and micro-nutrients in a well-balanced form that can be easily absorbed through the root system and then broken down chemically within the plant. Macro-nutrients are the elements that plants require the most to grow, Nitrogen (N), Phosphorus (P) and Potassium (K) are absorbed through plant roots in very large amounts, with secondary macro-nutrients such as magnesium, calcium, and sulfur also required by plants in large amounts. Plant roots absorb micro-nutrients in very small amounts. Zinc, manganese, iron, boron, cobalt, and molybdenum are all micro-nutrients which will be available in a good quality hydroponic nutrient.

We stock only quality hydroponic nutrients from Canna, Plagron, Biobizz, Plant Magic and House & Garden, and if you choose to use one of them we have all of their Hydroponics Feed Schedules available to download. These should only be used as a guide, as different plant varieties will require different levels of food to be supplied.

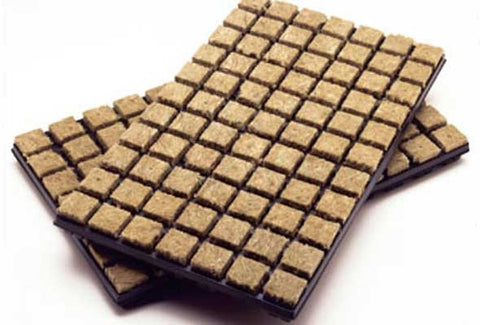
What Is Hydroponics Growing Media?

Hydroponics requires an inert growing media to be used, which is chemically inactive and contains no nutritional content as all the nutrients required by the plants to grow will be supplied in the water by you.

Hydroponics Growing Media is used mainly to support the plants that are being grown and allow the roots access to water, nutrients, and air at all times. This is one of the main reasons for hydroponics cultivation being so much quicker and better than soil grown plants. A soil grown plant will divide its energy into root growth and plant growth to ensure it uptakes any available nutrients, but a hydroponically grown plant is supplied with all the nutrients it requires directly to the roots and with higher amounts of oxygen also available, it allows the plant to concentrate more on plant growth.

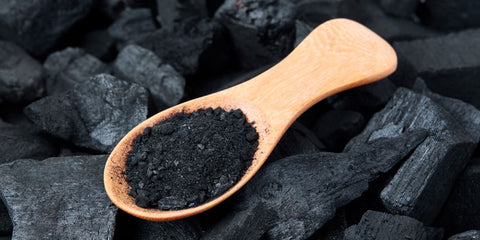
The most common growing media used for hydroponics is expanded clay pebbles and Rockwool fibers as these both can hold oxygen, water, and nutrients very well and contribute to the plants’ ability to grow very fast. There are several other growing substrates that can be used for hydroponics, such as perlite, vermiculite, gravel, and foam, all of which can deliver some great results.

Irrigation feed times can vary with the different types of hydroponics growing media, and it will also depend on the size of your plants and the environment conditions in your hydroponics grow room.

What Are The Benefits With Hydroponics?

Hydroponics offers many more benefits when compared to normal methods of plant cultivation, especially when it is used indoors in a controlled environment.

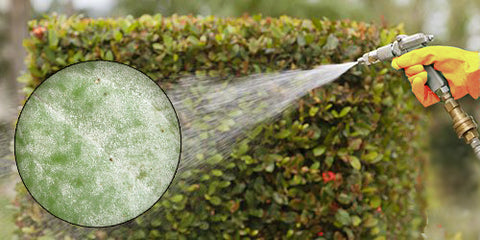
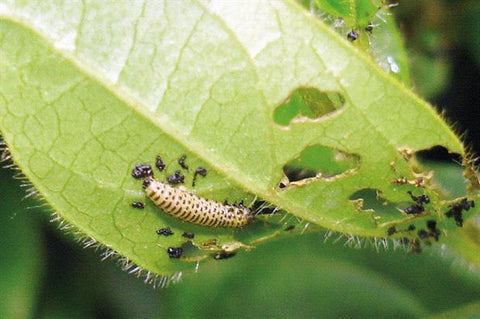
 1. Pests and Diseases

When growing indoors with hydroponics, the chances of pests and diseases occurring is very small, but if unfortunately, they do it can be far easier to treat and eliminate the problem. Hydroponics growing media is inert, containing no nutritional content so the chances of the growing media carrying any pests or diseases, is also very small if any. Usually, the main culprit who transports any pests or diseases into the grow room will, unfortunately, be you.
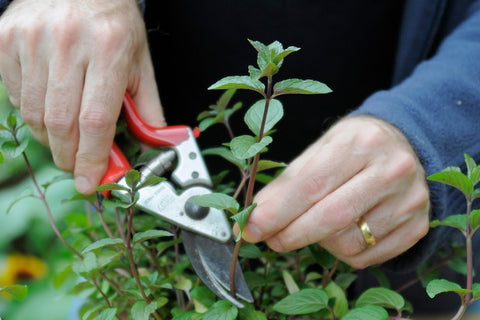
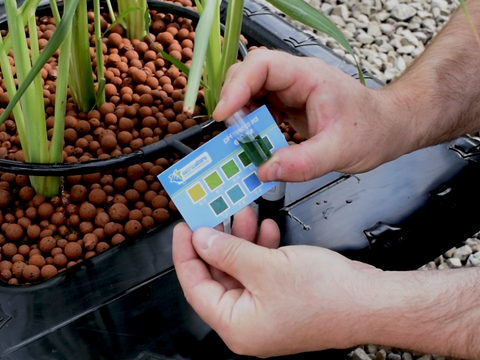
 2. Maintain Weekly

Growing many plants in soil can be a tedious task with many hours spent on maintaining the garden and feeding the plants, but with hydroponics a garden can be set up and checked weekly for maintenance, as a large tank of nutrient solution can be left at the correct PH and EC levels and automatically fed to the plants daily in the hydroponic system.

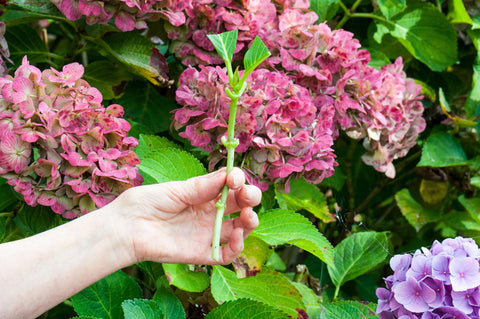
 3. Quicker Growth and Bigger Yields

As hydroponic systems provide the nutrient solution directly to the roots of the plants, the plants can put all their time and effort into vegetative growth up top. This provides much quicker growth from the plants and when growing fruit-bearing plants the yields that can be achieved cannot be matched with any other method of cultivation.

 4. Grow All Year Round

When using hydroponics indoors under controlled conditions, you can grow any time of the year and produce a consistent, bountiful harvest all year round. The outdoor temperatures and light conditions throughout the year play a major role for commercial growers who depend on good weather and light, but growing indoors with hydroponics defies Mother Nature and allows you to continue growing all year round.

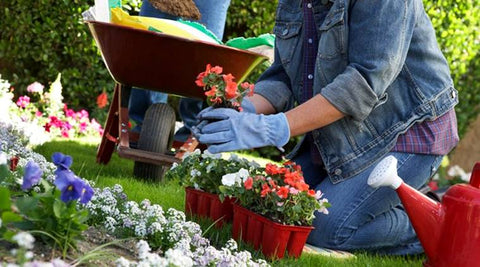
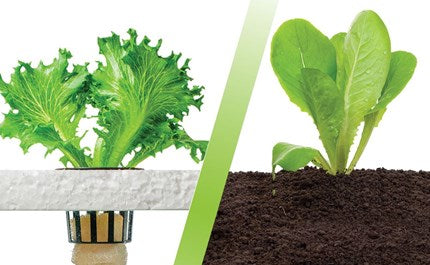
Is Hydroponics Better Than Soil?

Hydroponics is definitely better when compared to soil grown plants, the rate of growth and yield from fruit-bearing plants cannot compete from soil-grown plant to a plant grown hydroponically. Hydroponics supplies all water and nutrients directly to the roots of the plant and this means the plant does not have to develop a large root system to feed, but with soil the plant will divide its energy between growing upwards (plant vegetation) and also downwards (roots) to ensure a good supply of nutrients are available to the plant. To put it simply, a plant grown for ten weeks with hydroponics will be a lot bigger and stronger, yielding much more than a plant grown for ten weeks in soil, and if the plants are flushed correctly to remove all the nutrients before harvest, the taste from your fruits should be much the same.

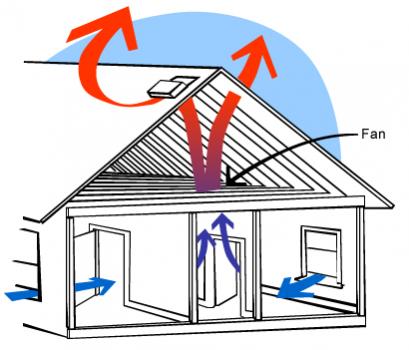
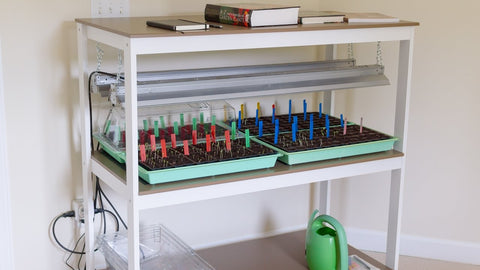
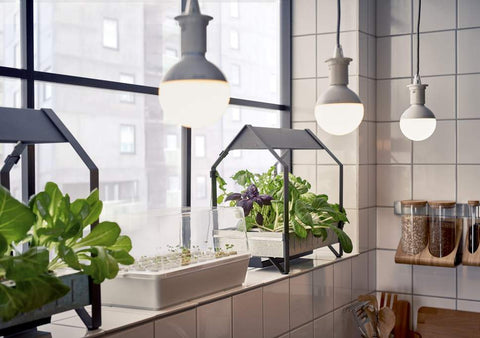
What Do You Need For Hydroponics At Home?

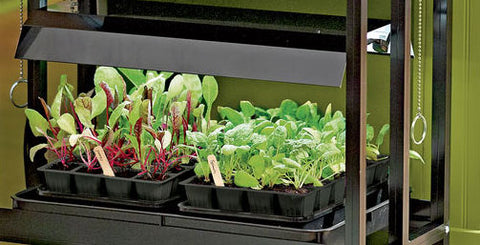
Now you have a clearer idea to what is hydroponics, you may well wonder what you will need for you to grow your own fresh produce at home and setting up hydroponics grow room at home couldn’t be simpler these days, with all the specialist equipment that is available. Hydroponics at home requires an enclosure for your grow room, which can be an empty cupboard or a grow tent and you will most certainly need a grow light. Apart from a hydroponic system, the other major items you will need are some fans, ducting and a carbon filter to control the environment inside your grow room.

“Plants are very much like humans, they require a night and day period and given a warm sunny climate with good food and plenty to drink, they will be very happy and flourish”

Portable Desktop Hydroponic Gardens

With the global movement towards an industrial economy, less and less agricultural space is left for the growing of vegetables, fruits, trees, plants, and flowers. But technology has created methods of growing all that that you like within your own small spaces. Over the years, a number of systems have been developed to shield the plants from outdoor problems and hydroponics is becoming widely adopted. Hydroponics is quickly gaining popularity in places where traditional farming simply isn’t an option such as in large cities where there is a little access to agriculturally viable land.


Let’s begin this with what actually hydroponics is? Hydroponics is the art of growing plants without soil. Instead of soil plants are grown in a growing medium like Rockwool, perlite, coconut fibers, and gravel. Plants are among the few organisms that can synthesize all the required metabolites from inorganic ions, water and CO2 using the energy captured from Sun. So, Hydroponics is a method of growing plants that take advantage of this fact by providing all nutrients, in their inorganic form, in a liquid solution with or without solid media. Hydroponics systems have been utilized as one of the standard methods of plant biology research and are also used in commercial production of several crops using lettuce and tomato.


With new technology comes new capabilities when we began to mass produce Full spectrum LED lights, we didn’t realize but they had a major leap in our food production capabilities. Now we can grow most major crops, fruits, and vegetables indoors. Our full spectrum lights mimic the sunlight and the indoor environment makes sure your plants are never stressed. Besides, we literally brought the green herbs and plants indoors. But for years, the hydroponics industry has been focused on enthusiasts and professional growers and most people have not witnessed the awesomeness of growing greens indoors. Step in portable hydroponic garden systems. Since LED units can be made of any imaginable size, there are innovative companies that make it possible for the average person to keep beautiful plants indoors. These portable gardens are becoming more and more automated and you usually have to just look at your plants once a month to get everything running smoothly. Forget breaking your back in your backyard garden. Portable hydroponics brings greens inside your home.


Portable hydroponics usually has three parts –

  1. Full spectrum LED lights – These are the heart of the system. The full spectrum LEDs are what make growing indoor garden possible. These lights have all the wavelengths that a plant needs to thrive. They mimic sunlight and your plants don’t complain.
  2. Water reservoir – Hydroponics works on the principle of no soil. All the nutrients are delivered to the plant directly by dissolving them in water. Every portable hydroponics system has a built-in reservoir where you can add water and a set amount of liquid fertilizer.
  3. Soil medium – Vermiculite, rock wool, coir or foam. This is the place where your seeds grow and the roots extend. This is usually submerged in water or has water periodically fed to it. Your roots are mostly always dipped in water and keep getting nutrition for the plant.


THE BASICS OF HYDROPONICS

With the knowledge of hydroponics, you can grow anything like plants, food crops, flowers in a liquid medium without the use of soil.  These crops can be grown indoors year-round, regardless of the outdoor environment, so long as the need of crops is met. Hydroponics systems and variation allow a greater amount of flexibility for growers. For those who may have limited growing space, plants can be moved as needed and seedling production can be done somewhere else. With plants grown indoors, there is no pause for seasonability. These systems are engineered to provide the proper amount of nutrients at exactly right time resulting in higher yields and better plant quality.

The grower controls the nutrients, the growth cycle, and the water. Variability is much less in such a controlled environment, leading to less waste and less cost. Although these systems depend on water and water-based solutions to function properly, they use only about one-twentieth of the amount of water used in traditional gardening or farming.

TYPES OF HYDROPONICS SYSTEMS

  • WICK GROWING SYSTEM: This is considered the most basic type of system.
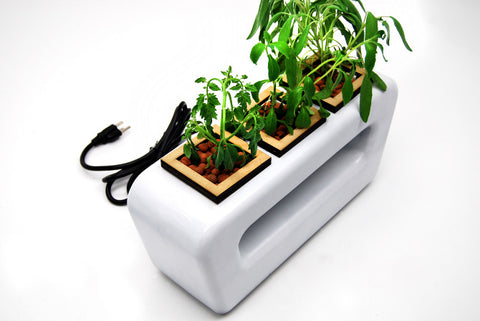
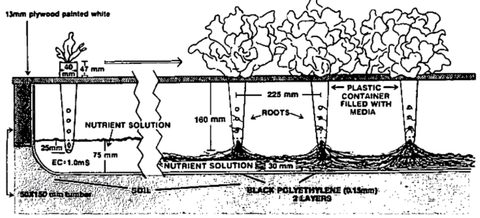
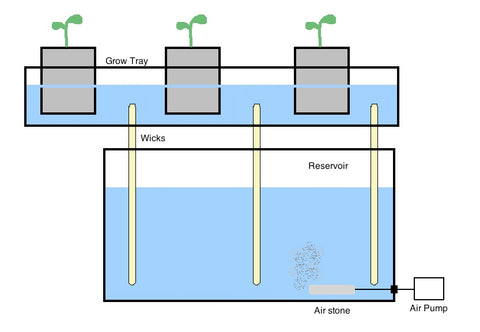
It is a passive system which means it has no moving parts. Nutrients move from the reservoir to plants roots by a wick or string. Plants can be housed in a variety of growing mediums some of which are coconut coir, perlite or vermiculite. Due to their simplicity, these systems are a great option for growing smaller plants. The drawback with this system is that they can be inefficient if not set up properly, plant growth will be hampered.
  • WATER CULTURE GROWING SYSTEM: These are technically the most simple ones to use. Plants roots are suspended, often in net pots held by Styrofoam platform, directly in nutrient solution. An air pump is used with an air stone to pump oxygen into water. Proper aeration of water is of prime importance in this technique because the roots remain submerged all the time.
  • NUTRIENT FILM TECHNIQUE GROWING SYSTEM: This is the most commonly thought system with commercial production but also with home growers. Plants are grown in channels that have a thin layer of the nutrient solution flowing through the base and constantly running along the bottom of the channel. The roots are wet, but not submerged. When the solution reaches the end of the channel, it drops back into the main reservoir and is sent back to the beginning of the system again making it a recirculating system. This kind of recirculating system is great because it produces less waste. However, it relies on heavy use of pumps and any mechanical failure can be proved fatal for plant growth.
  • EBB AND FLOW GROWING SYSTEM: It works by flooding the plant roots with nutrient solution temporarily.
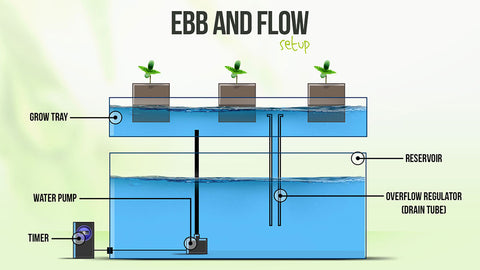
After a period of time, the solution is allowed to drain back into the reservoir. Controlled by a submerged pump with timer, this process of flooding occurs several times a day. While this method is using energy and water efficiently, plant roots can dry out quickly if environmental conditions are off or if the schedule falters due to mechanical failure.
  • DRIP GROWING SYSTEM: These are one of the most widely used systems in the world. They are simple to operate on a large scale, making it ideal for commercial growers. Controlled by a timer, a pump releases nutrient solution onto the base of each plant via drip lines. In a recovery drip system, the excess nutrient solution is collected and reused. This setup is more sustainable; however, pH and nutrient strength levels may vary and must be monitored.
  • AEROPONIC GROWING SYSTEM: This is the most technical system; however, the theory of aeroponics is quite simple. These systems operate primarily with plant roots hanging in the air, while some can use a growing medium. A timer is used to control the nutrient pump, ensuring that the plants are misted with the nutrient solution every few minutes. Unlike other systems, these systems expose plant roots to a lot more oxygen. The materials to make these type of systems can be costly somewhat as compared to others.

BENEFITS OF INDOOR HYDROPONICS

  • REDUCE INDOOR POLLUTION: Plants have an amazing potential of detoxifying the air. Indoor plants help in removing chemical toxins present in the air. These remove pollutants by absorbing harmful gases through their leaves and roots. They produce oxygen which helps in an enhanced level of oxygen & therefore improved air quality inside the building. The ability of an indoor plant to remove harmful chemical moving in the air is an example of phytoremediation.
  • GET FRESH FRUITS WITH ZERO WORRIES: Adulteration is a common thing with the fruits and food crops. With the increase in industrialization, the use of pesticides and other chemicals in growing fruits have increased a lot, which in turn is becoming a problem to human health causing lots of diseases. But with the invention of hydroponics, this worry has been set to zero as now you can get fresh fruits within your home without too many efforts.
  • TURN EYEBALL AND GAIN COMPLIMENTS: Apart from being an excellent way to grow plants, fruits, and flowers, it has also become a symbol of interior decoration. With people from elite class to middle class are gaining the benefit of fresh fruits, food crops and beautiful interior designs using hydroponics.


HOW DO YOU WISH TO BUILD A GARDEN?

Here are some smart options for you-

  • SMALL AQUAPONIC UNITS: It is symbiotic cultivation of plants and aquatic animals in a recirculating environment.

A simple aquaponic system can be built using an old fish tank, a box, some rocks, plants, and a pump. Take an old plastic storage box, drill two holes on one side. One for the pump to go through, one as an overflow valve. Along one side drill a series of holes to drain water back to the tank. Make a grow bed. A grow bed is something where plants can be grown, fine rocks can be a solution to make grow bed. Then simply placed the container on the top of the tank at an angle to allow drain holes to be flown back into the tank and the pump and overflow near to the top. This is the simplest thing tried.

  • AUTOMATED HYDROPONICS: The hydroponics system was automated using microcontrollers and sensors to keep human intervention at a minimum. An Internet Of Things (IoT) network was created to improve reliability and allow remote monitoring and control if needed. The user is only required to plant a seedling and set initial parameters. Once done, the system is able to maintain the parameters and promote healthy plant growth.
  • GO THE NATURAL WAY: Plant in a pot. This usually a little hassle because you need to take care of the plant, keep them outdoors in sunlight every day. This all efforts can be avoided using modern LED systems that are used in hydroponics.

12 Ways To Reduce Indoor Pollution And Get Clean Air In The Home

As we step into 2019, Indoor pollution has become a real problem. Consider the amount of time you spend in a closed environment. Most of your day is spent indoors. Indoor pollution is a slow poison. The air inside your home is fundamentally same what is found outside, but the amount and type of contaminants are different. In this piece, we are discussing some ways to significantly reduce air pollution inside your home so you and your family can breathe better. The best part? We focus on natural methods that don’t require you to take on any kind of trouble. Read on.

Let us first define indoor pollution. Scientifically, it is the presence of physical, chemical, biological contaminants in the air of confined environments such as rooms, buildings, institution, or a commercial facility, which are not naturally present in high quantities in external environments.

Indoor pollution is a very real and dangerous thing because indoor air is far more concentrated with pollutants than outdoor air. An estimated 2.2 million deaths happen each year due to indoor pollution (compared to just 500,000 deaths from outdoor air pollution).

Indoor pollution can also pose immediate health effects like headaches, dizziness, fatigue, asthma, hypersensitivity to substances, irritation to the eyes, ears, nose, and throat. In the long term, people may develop cancer, respiratory diseases, or even heart diseases. Different people react differently to the same conditions, but the most common effects of indoor pollution are respiratory, dermal and mucosal irritation, effects on nervous system, cardiovascular, effects on the gastrointestinal system, and even effects on the reproductive system.

Energy efficient home improvements sometimes lead to airtight houses, reduced ventilation, use of synthetic materials for building and furnishing, chemicals, pesticides, and household care products which are the prime causes of health issues. Indoor air pollution can even be subtle and may not always show easily recognizable impacts on you. But it might be harming you in other ways.

How do you get rid of pollutants currently inside your home? How do you make sure it stays clean even after days and weeks of a cleanup? Here are some actionable ways to immediately reduce the effects of Indoor pollution. You can implement one or more of them for best results.

1. Improve Your Ventilation

Adequate ventilation is the key to promote healthy indoor. Opening window is the easiest thing to do. Make sure that your stove is properly ventilated to limit the generation of carbon monoxide and hydrocarbons produced due to incomplete combustion. These gases may pose serious health effects in long run.

2. Grow Indoor plants

This is probably the best way to cut down on indoor pollutants. According to NASA, household plants are the best option to purify the air within our houses and workplaces. NASA says that plants safeguard you from any side effects associated with prevailing toxicants like ammonia, formaldehyde, and benzene. They have also created artificial soil media and full-spectrum lighting that allow you to grow smart portable hydroponic systems indoors with literally zero effort. The best indoor plants include Peace Lily, Lady Palm, and Broadleaf Lady Palm. You can even go for edible herbs, fruits, and vegetables. If you are all about green spaces in your rooms, we talk about how to grow plants with zero maintenance hassle at the end of this article.

3. Burn Beeswax Candles

Use them in case of persistent issues. Beeswax acts as a natural purifier. These candles ionize the air and neutralize the toxic compounds and other contaminants. They also burn slowly and remove dust from the air.

4. Salt Lamps

Salt lamps also act as natural air purifiers and are useful if you have persistent irritation indoors. Salt crystals tend to adsorb airborne irritants, pathogens, and allergens by pulling water vapor out of the air. Himalayan pink salt is a natural air purifier that pulls toxins from the environment and neutralizes it.

5. Activated Charcoal

Activated charcoal is used in many beauty products. It is also a natural air purifier. It is made of finely powdered carbon and very quickly absorbs a lot of toxins and holds them within its molecular structure. This black substance is odorless, highly absorptive and eliminates toxins from the air. Another product that can be used as its substitute is bamboo charcoal.

6. Install Exhausts

Humid air in your bathroom and kitchen increases exposure to mold and mildew. Molds produce tiny spores that can enter your body and cause cold, fungal infections, persistent coughs. Proper exhaust hoods should be installed over the exhaust fans in kitchen and bathrooms.

7. Ban Indoor Smoking

Smoking inside the house leads to an accumulation of toxic gases inside which seriously affects the indoor air quality. Smoking is also associated with numerous cancerous diseases. Second-hand smoke impairs respiratory health and causes lung cancer in non-smokers as well.

8. Remove The Source – Never Mask Odors

People usually try to suppress indoor odors by masking them with artificial fragrances and air fresheners. It worsens the problem because these things contain phthalates and other harmful chemicals which can affect your health seriously. Avoid use of air fresheners, scented candles, incense and the other odor-masking fragrances which can trigger asthma. Instead, find out the source of odor and get rid of it.

9. Manage Insects

Keep your food in the fridge and seal all the cracks to avoid pests and insects. This will reduce the use of pesticides and other harmful critter elimination methods. It helps to reduce the toxicants inside the house.

10. Regular Cleaning And Dusting

Dust carries bacteria, mold spores, and even pet dander. Use microfiber cloth instead of a cotton rag. It is recommended for cleaning your indoors. If you have pets, brooms can just stir up more dust. So do it regularly and do not let anything accumulate.

11. Remove The Carpets

Carpets absorb lots of dust, mold spores, mildew, and pollens. Instead of using carpets use hard-surface flooring. This makes sure there is nothing that absorbs and stores dust and other pollutants in your home. Carpets are usually a storehouse of contaminants. Instead, use doormats and remove your shoes at the door.

12. Get An Indoor Air Purifier

If all else fails, or in really bad situations, use an indoor air purifier from a good brand. Make sure you compare all your options before getting one. This is only required if all else fails or if you are living in an especially polluted part of the town, as Indoor Air Purifiers can quickly become very pricey and might be an overkill for moderate situations. These devices actively suck in polluted indoor air and give out purified air. A common side effect is increased dependence on the air-purifier and breathing issues in the absence of any purifying equipment.

Bonus –

Green Spaces With Zero Effort – Reduce Indoor Pollutants Naturally

Growing green plants indoors is one of the best methods to keep your surroundings both green and clean. Humans have evolved around plants and we need greenery for functioning properly. But it cannot always be possible to take care of plants for a lot of people. Keeping indoor plants involves regular watering, caring, taking them out into the sunlight, and so on – which gets tiring, especially for busy people.

Herboponics produces fully automated hydroponic gardens that you can keep on your desktop, or kitchen top, or even in your living room. Our smart portable gardens help you reduce indoor pollution effectively. The smart gardens work on the principle of Hydroponics – a method of growing plants without soil, by using mineral nutrient solution in a water solvent. This ancient method, coupled with modern full-spectrum LED lights and sensors helps us to create portable green spots in your home that both soothe you and keep you safe from the effect of indoor pollutants. Your smart garden quickly is guaranteed to become the favorite thing in your home by helping you grow greens with zero effort.

Indoor pollution is not something you should ever ignore. It is a silent killer that is haunting major urban areas, globally. It is always a good idea to get serious about it and take action. We hope you got some actionable tips that you can use to cut down pollution inside your home. Drop your comments if you have any more ideas to share!

History Of The Suspended Pot, Non Circulating ‘Kratky’ Hydroponic Method

One of the simplest Hydroponics systems has been around for thousands of years. It is now called the Kratky Method and it is really easy to set up at home. This is a complete guide to setting up your own Kratky hydroponics system at home.

In the Kratky suspended pot non circulating hydroponic method, tanks are filled nearly to the top with nutrient solution. It is covered with holes in it and is placed over the tank. Individual net pots containing growing medium and seedlings are placed into the holes. The lower 1/2 inch or so of each net pot is immersed in the nutrient solution.


The entire growing medium in the container moistens by capillary action, by automatically providing the plants with water and nutrients. The nutrient solution level in the tank drops below the net pots within a few weeks. But by this time roots have emerged from the net pots. The roots in the solution continue taking up water and nutrients, while roots between the net pot and the surface of the solution give out oxygen and take up air from the humid air layer between the tank cover and the nutrient solution.

In this case, the lettuce crop is harvested before the nutrient solution is exhausted. Then the tank is cleaned and refilled with fresh nutrient solution and the process is repeated. In the case of a short-term crop like lettuce, the entire crop is grown with a single application of water and nutrients.

No effort is needed from transplanting the seedlings until harvest. Longer-term crops may also be grown by a suspended pot non circulating hydroponic method. These include tomatoes and cucumbers. The additional nutrient solution needs to be added via a float valve throughout the crop. A demonstration tank that was used to grow tomatoes. At transplanting time, the nutrient solution level was about 1/2 inch above the screen. The growing medium in the accelerator pots was moistened by capillary action. The crop grows in the nutrient solution level decreases to about 2 inches below the screen. It is maintained at that level throughout the rest of the crop by the float valve pump assembly.

Science Behind The Kratky Method

In 1666 Robert Boyle an Irish scientist proved that rainwater alone will not nourish plants proper juices such as that president dome must be added to the water to nourish plants. In 1699 John Woodward an English scientist found that the greatest growth occurred in water which contained the largest amount of garden soil. From 1851 to 1853, the French Chemist, Jean Boussingault established that plants could grow in an inert medium such as silica sand which was moistened with a solution containing chemicals or nutrients. Around 1860 both Sacks and Knop eliminated the need for sand as a support for plants and were able to grow plants in the only nutrient solution that is water and chemicals. 

In the late 1920s in the 1930s professor Garicke at the University of California experimented with commercial sized applications of this new agricultural science which was becoming known as water culture, soilless gardening, soilless culture, nutrient culture, and hydroponics.

The recommended basin or tank which held the nutrient solution would be about six inches deep. And might be two to six feet wide and maybe 20 30 40 feet long and some tanks could even be as long as 150 feet long. One inch wire mesh or chicken wire was stretched across the top of the basin. It was painted with a quick drying as fall paint to prevent corrosion of the wire and leaching of the zinc into the nutrient solution. About a three-inch layer of straw would excelsior our other course material was placed on the wire and this became the seedbed. Ruse from the plant grew down into the nutrient solution. And the nutrient solution was allowed to recede up to three inches. Thus, Gericke employed a moist air space.

The moist air space in the tank plus the air in the seedbed provided adequate aeration and there was no mechanical aeration. Gericke’s method provided excellent growing conditions for various crops. For example, 16 pounds per plant of tomatoes were produced.

Modern plastics commonly used for hydroponic tanks today had not yet been invented in Gericke’s options for tank materials included wood, metal, asphalt roof paper and concrete.

Arnon and Hoagland at the University of California also applied forced aeration into the nutrient solution of the Gericke’s method hydroponic tanks. Aeration improved the growth of the plants and the yields were 21.1 pounds per plant in the AIRAID solution treatment versus only fifteen point seven pounds per plant in the non-aerated solution. Thus aeration increased the yields by 34 percent.

Thereafter it was assumed that the nutrient solution needed to be the aerated system.

In 1985 Dr. Imai who was a scientist on assignment to AVR DC from Japan. Dr. Imai showed some soybean plants growing without aeration. That hydroponic plants needed to be aerated.

Dr. Imai’s Method

In Dr. Imai method, a seedling bag was made of netting and filled with smoked rice husks. And this was supported by a polystyrene tank cover. There was also a layer of netting 15 centimeters below the tank cover. Initially, the seedling bag was immersed about one centimeter in the nutrient solution. The nutrient solution level decreased as the plant grew.

And an increasing air space developed. Roots growing in the airspace were called all roots or oxygen roots their main function was aeration and the roots that grew in the nutrient solution were called W N or water and nutrient roots and their function was to gather water and nutrients. The oxygen roots are more fluffy and branched than the W n roots. When the w n roots are exposed to air they take only two to four days to be converted to all roots. However, if all roots are immersed in water they become non-functional and the plants’ wilt and possibly may die.

Therefore one shouldn’t add more than one or two centimeters of water at a time to these tanks nor should they be exposed to heavy rainfall.

Dr. Imai also discusses a home production system where the tank is a plastic container. It looks and functions very much like systems. It became apparent that Hawaii has many areas where the climate is suited for vegetable production, but the soil is too rocky or infested with disease organisms or nematodes and electricity are either too expensive or not available in many possible production areas. Some adaptation of Dr. Imai non circulating hydroponic system would be ideal for Hawaii.

Growing Medium Submerge In Nutrient Solution

The layer of the screen was placed about ten centimeters below the top cover. At transplanting time, the growing medium was partially submerged in the nutrient solution. As the plant grew the nutrient solution was consumed and eventually, the nutrient solution level dropped below the screen thus creating about 10-centimeter air space.

Nutrient solution was added once or twice a week to keep it at that level but we never added more than 2 centimeters of nutrient solution at a time. During a 62 day harvest period from December to February yields from the hydroponic tank or 3.5 kilograms per plant versus 3.1 kilograms per plant from soil-grown tomatoes. Therefore this non-circulating hydroponic system was competitive with soil bed production.

Grew lettuce in plastic forestry tubes where the bottom 25 millimeters was immersed in the nutrient solution. The initial solution level of 75 millimeters dropped down to about 30 millimeters at harvest time. The hydroponic lettuce yielded about 250 grams per head versus only 201 gram per head for soil-grown lettuce.

The two hydroponic patents have now expired and the technology in the pants may be used freely for any legal purpose. There was held the first non circulating hydroponic workshop in Hilo and dr. Imai was a special invited guest speaker. The workshop was very successful but never held a second workshop.

The advantages of net pots and use of net pots instead of forestry tubes for short term vegetables. In 2004 there was presented a paper in New Zealand on a suspended pot non-circulating hydroponic method for lettuce, tomatoes, and cucumbers. In 2005 we wrote a paper on non-circulating hydroponic methods for growing tomatoes.

A paper entitled three non-circulating hydroponic methods for growing lettuce was presented at the international symposium for soilless culture and hydroponics in Lima Peru. A suspended net pot non circulating hydroponic method for commercial production of leafy romaine and semi-head lettuce is a flagship article and was published by the University of Hawaii College of tropical agriculture and human resources.

About five years ago MHP Gardner demonstrated this hydroponic method in a YouTube video.

And there have been over 800,000 views.

MHPGARDNER read one or more publications and built a hydroponic tank setup as described in the publication. He wanted to give credit to me as the author of the publication and thus referred to this as Kratky method.

MHPGARDNER produced at least five excellent YouTube videos where he described this hydroponic method as the Kratky method. In total there have been over two million views of these youtube. This method really should have been called the Sachs method or the Gericke method or certainly the Imai method.

But with over two million views this suspended pot, the non-circulating hydroponic method has become known as MHPGARDNER has proclaimed it – ‘The Kratky Method’.

How Far Should My Lights Be From My Seedlings

The lights you’re using in hydroponics systems. That’s usable light between 120 and 150 micromoles per square meter per second.

If you’re using an LED light like the Philips lights you can usually place these around eight to twelve inches from your seedlings. You can usually place five to six inches. And you’ll end up somewhere in that range.

We’re not just measuring directly under this light if we just measured right all the time. We need side by side in order to cover all of our seedlings. You basically want to actually set the lights up and look for nice even coverage. If you have a par meter that’s great but most of you don’t. So you’re just going to have to eyeball it. We can get away with a little bit less for the same amount of wattage.

We can spread these out about twice that length. So every eight to ten inches on the LEDs and still get pretty decent seedling production. Therefore, the intensity is really important with seedlings. Seedlings will usually grow if there’s enough CO2. If there’s enough of these other environmental variables present they’ll usually grow about as fast as you give them light.

So if you give them a little more light they’ll grow a little faster. If you give them a little less light they’ll grow a little slower. And also important is day length, you want to be delivering around 120 to 150 micromoles per square meter per second of light to your seedlings. If you’re doing that they’re going to grow great for you. And you’re really going to get great ceiling production.

How Long To Keep Lights On My Seedlings?

Duration of light exposure for your seedlings is quite a question that everyone should be answering. And for most crops that are going to be 12 to 18 hours. So when you put your seedlings in, you’re going to turn your lights on for 12 hours or 18 hours somewhere in that range.

Depends On Cost Of Lighting And Cost Of Real Estate

You can turn your lights on for up to 24 hours with a lot of different seedlings. But the limitation is, it depends on two things. It depends on the cost of your lighting and the cost of your real estate. So Rackspace in your seedling system if you just have one seedling system or one area where you’re able to grow these seedlings out that’s valuable space. And you have to think about that as a cost, on the other hand, you also have light and your electricity use which is also heavy on your pocket. So if you’re in a place where you have lots of areas to grow your seedlings, you can afford to do a shorter day length and less light intensity.

And move those seedlings much more slowly however if you’re in a place where your real estate costs are high where you have limited rack space, limited seedling space you will want to give them more light and move your seedlings a lot faster.

Those are the two important things to think about as a grower what do you care about more; your space or your electrical use. We kind of split the difference we ended up about halfway between them. Most of our crops are on for about fourteen hours a day. And we can push almost everything through in about two weeks at most for really slow growing stuff about three weeks.

Just think really carefully about what’s most important to you is it real estate or is it light cost. If you’re a home grower and you’re doing it on a small scale and you don’t really care about either. Then, just do it fast, turn your lights on for 18 hours a day. You can turn them on for twenty a day for a lot of crops even 24 hours a day and you can move those seedlings a little bit.

Must Need a Lot Of Good Air Circulation

For most crops, you’re just not going to get a whole lot more out of them at 24 hours than you would at 18. That’s the reality 18 is usually where they start to max out on their growth. Typically if you’re planning on turning them off its if it’s not inconvenient for you to just turn those lights off run them for 18 hours a day. Make sure there’s lots of good air circulation there, one last thing to think about is if you’re at 12 hours a day and you’re in this nice protective seedling environment you will want to harden off those seedlings before they go into the main system.

Now hardening usually is referring to like getting them accustomed to lower humidity, light and cold temperatures. Basically, the light levels are going to experience in the main system transplanting results in a lot of shock for these seedlings. So if they’ll shock, they’ll slow down they won’t grow as fast when they first grew and for you as a producer that’s an important thing because that lowers your productivity overall.

So you want to minimize shock and the way that we do that is we ramp up our light. We drop our humidity we more closely make our seedling system variables resemble those of our main system as we get closer and closer to transplanting day. That’s something that’s really important to think about because it may mean you need to go from 12 hours to 18 hours of light. And you may need to go from 100 percent relative humidity down to 70 or 60 to make sure that your seedlings aren’t too shocked when they go from a seedling into the grow-out system.

Seedling Racks for Commercial Hydroponics

A lot of seedling systems end up being racks and there’s a good reason for it they don’t need that much space. So most of these seedlings are really nice and low when they go in their trays.

Save A Lot Of Space 

It’s just a seed stick and maybe a quarter inch up and when they come out depending on the crop. There is not much height, maybe two or three inches at most is the height of the seedling. So we don’t actually have to give them that much room. And especially for using something like LEDs it means we can get that light really nice down close to the tops of those seedlings that means we could save a lot of space by stacking them up.

Basically, have a rack something like this problem for a system this size or even bigger and it can supply all of the plant material. Once you have several of these racks side-by-side you’re really able to grow a lot of plant material for a lot of production in a really small amount of space. So, the seedling systems are typically a few different types when it comes to like the irrigation. The pump will come on it will fill this one up, then a siphon pulls all that water successively down to the bottom it drains to our sump tank. We can transplant it but the fact that it kind of all empties and drains down to a sump means, we can just unclip it and roll it around and it stays fairly lightweight. 

That’s one nice thing about this the other way to do these seedlings is a misting system. So what you’ll have is like basically a little artificial leaf that will tell the system when to turn on and missed all of the plans to kind of keep them hydrated keep. That humidity really nice and high and that works pretty nice. But we try to avoid that a little bit more simple as you end up with more like leaf disease issues when you have water on the leaves.

It really only needs to flood and drain maybe a couple times a day really no more than two or three times over the course of the day. And that encourages good root growth within the cube, it encourages the plants not to send too many roots out as it will prune everything that kind of comes out the bottom and dries out. And we end up with nice compact plugs that will transplant really nicely when we put them into towers. On this seedling system, we’ve got a lot of different stuff going. We’ve got basically some curable and kales. We got bok choy going and some out-of-control nasturtiums which were growing way faster than anything else.

And at this point, we’re just waiting on some electrical to finish up to get all of these into the main system. But as soon as the electrical is done hopefully in a day or two all the stuff will go in and we’ll get this crazy nasturtium out. But this is kind of a typical crop mix for us. As far as you know growing out stuff that’s valuable. And you can see how much we could get. These are like 200 cube trays. We’ve got a lot of plant material really, a lot of plant material several thousand plants and that’s enough for this system.

It Equipped With Lighting

So these systems are equipped almost always with some type of lighting. We’ve got Philips LEDs but we’ll probably be using in our next one more fluorescents and the reason for that is that these plants really don’t need an awful lot of light. They’re little bitty tinder babies when they come into the system. We’re not giving them full strength nutrient solutions we’re giving them kind of much lower concentrations of nutrients. We give them a lot less light. The reason for that is they just don’t handle the stress of going from a little seed that just broke through the seed coat.

You’ve got this little chute starting up to full light and full nutrient solution. Therefore, we can put them under less light and we can give them less nutrient solutions and they actually like that right off the bat and then over time we can kind of increase the amount of light that we give them. While we’re using LEDs our next one will probably just be regular fluorescents. A lot of these benches are fluorescents. They’re nice too because they give off a little more heat than the LEDs do and you can kind of warm up the seedling environment.

Now the thing to watch out for with fluorescents is that you need to give them enough space that those Celie’s can’t grow into them. Or they’ll burn of course or get too close the nice thing about the LEDs. You can have plants that grow right into the LED. And you’ll end up with a few spots. And there’s dry out a little bit but by and large, your seedlings aren’t going to get burned by LEDs. Therefore, it’s just mostly management and of course, the fluorescents are going to be a lot more cost-effective than trying to put an LED system in for your seedlings.